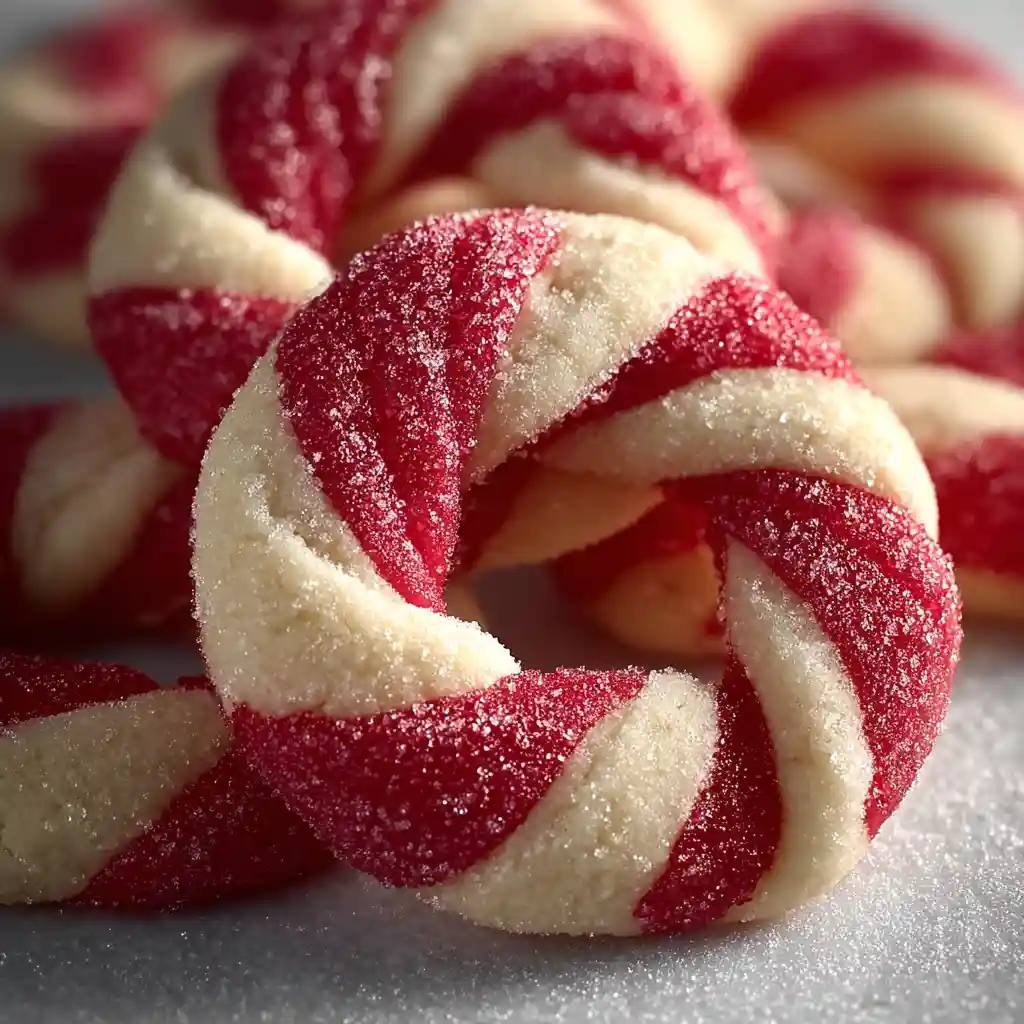
The scent of peppermint and the sparkle of festive colors instantly transport me back to my grandmother’s kitchen during the holidays. Every year, without fail, we’d spend an afternoon creating a colorful chaos of flour, butter, and sugar, culminating in a batch of homemade Christmas cookies. Among my favorites was always the candy cane cookie. It’s not just a cookie; it’s a symbol of cozy traditions and shared moments.
This year, I’m so excited to share my own go-to recipe for Candy Cane Cookies with you all. It’s a delightful, festive treat that’s perfect for your holiday baking adventures, and with a total time of about 4 hours 30 minutes (including chilling), it’s manageable even for a busy season. Get ready to bake some holiday magic!
Table of Contents
Candy Cane Cookies
Ingredients
Equipment
Method
- In a medium bowl, whisk together the flour, baking powder, and salt. This ensures everything is evenly distributed.
- In the bowl of my stand mixer fitted with the paddle attachment, I beat the softened butter and granulated sugar together on medium speed until they become light and fluffy, which takes about 3 minutes. I then beat in the large egg, vanilla extract, and peppermint extract. It’s important to stop and scrape down the bowl once to make sure everything is incorporated.
- With the mixer on low speed, I gradually add the flour mixture. I beat just until the flour is combined. If a little bit of flour remains at the bottom of the bowl, I remove the bowl and knead the dough by hand a few times until it’s fully incorporated.
- I remove about half of the dough from the bowl. To this portion, I add the red food coloring and mix until it’s well combined. If I’m using liquid food coloring, I add about 1 teaspoon. If it’s gel, I add just a few drops. I add more if the color isn’t as rich as I’d like. I wrap each portion of dough separately in plastic wrap and press each into a 1-inch thick disk. Then, I refrigerate them for at least 4 hours, or until they are firm to the touch. This dough can be chilled at this stage for up to 3 days.
- When I’m ready to bake, I preheat my oven to 375°F (190°C). I line two baking sheets with parchment paper.
- I cut each chilled dough disk into 1-inch cubes. Then, I roll each cube into a ball. On a lightly floured surface, I gently roll the dough balls into 5-inch-long ropes by rolling the ball up and down on the counter with my palm.
- I place two ropes side by side and carefully twist them together. To create the candy cane shape, I curve one end down an inch or so to form the handle. I place the shaped cookies on the prepared baking sheets about 1 inch apart.
- I bake the cookies for 10 minutes, or until they appear dry. Immediately after taking them out of the oven, I sprinkle them with the crushed peppermint candies. I let them cool on the baking sheet for a few minutes before transferring them to a wire rack to cool completely.
Nutrition
Tried this recipe?
Let us know how it was!What are Candy Cane Cookies?
Candy cane cookies are a beloved holiday classic, instantly recognizable by their festive red and white stripes and their cheerful candy cane shape. These cookies are more than just a treat; they’re a visual representation of the holiday spirit, often adorning Christmas trees, cookie platters, and gift boxes.
Their sweet, minty flavor and charming appearance make them a quintessential part of Christmas celebrations, bringing smiles and a touch of whimsy to any gathering.
Why You’ll Love This Candy Cane Cookies Recipe
I’ve tweaked this recipe over the years to make it even more enjoyable for home bakers like me. You’ll love this version because:
- Simplified Chilling: The dough is designed for a firm texture that chills efficiently, making it easier to handle for shaping those classic candy cane swirls.
- Accessible Ingredients: All the components are common pantry staples, so you likely have most of them on hand already.
- Clear, Step-by-Step Guidance: I’ve included detailed instructions to walk you through each stage, ensuring your candy cane cookies turn out perfectly.
Ingredients
- 3 cups all-purpose flour ((360g))
- ½ teaspoon baking powder
- ½ teaspoon salt
- 1 cup unsalted butter (softened (227g))
- 1 cup granulated sugar ((200g))
- 1 large egg
- 2 teaspoons vanilla extract
- 1½ teaspoons peppermint extract
- 1 teaspoon red food coloring
- 3 tablespoons crushed peppermint candies
Why These Ingredients?
Each ingredient plays a crucial role in creating the perfect candy cane cookie, from texture to flavor.
| Ingredient | Role in Recipe | Substitution Options | Consequence of Substitution |
|---|---|---|---|
| All-purpose flour | Provides structure to the cookie. | Cake flour (for softer cookies), bread flour (for chewier cookies) | Cake flour might make cookies too tender, bread flour can make them too tough. |
| Unsalted butter | Adds flavor, tenderness, and richness | Margarine, shortening | May alter flavor and texture; shortening can make cookies less flavorful. |
| Granulated sugar | Sweetens, aids in browning, and contributes to texture. | Brown sugar (adds moisture and chewiness) | Cookies may spread more and have a chewier texture. |
| Large egg | Binds ingredients, adds moisture and richness. | Flax egg (1 tbsp flax meal + 3 tbsp water), commercial egg replacer | May alter texture slightly, especially richness and binding. |
| Vanilla extract | Enhances overall flavor. | Other extracts (almond, lemon) | Changes the flavor profile of the cookies. |
| Peppermint extract | Provides the signature candy cane flavor. | Peppermint oil (use sparingly), other extracts (vanilla, almond) | Changes the flavor profile of the cookies. |
| Red food coloring | Gives the cookies the classic red color | Natural food coloring (beet juice), omit entirely | Color will be less vibrant or absent. |
| Crushed peppermint candies | Adds a crunchy topping and boosts peppermint flavor. | Sprinkles, sanding sugar, white chocolate drizzle | Changes the visual appeal and flavor complexity of the topping. |
How to Make Candy Cane Cookies
Here’s how I bring these festive cookies to life:
- Combine Dry Ingredients: In a medium bowl, I whisk together the flour, baking powder, and salt. This ensures everything is evenly distributed.
- Cream Butter and Sugar: In the bowl of my stand mixer fitted with the paddle attachment, I beat the softened butter and granulated sugar together on medium speed until they become light and fluffy, which takes about 3 minutes.
- Add Wet Ingredients: I then beat in the large egg, vanilla extract, and peppermint extract. It’s important to stop and scrape down the bowl once to make sure everything is incorporated.
- Incorporate Dry Ingredients: With the mixer on low speed, I gradually add the flour mixture. I beat just until the flour is combined. If a little bit of flour remains at the bottom of the bowl, I remove the bowl and knead the dough by hand a few times until it’s fully incorporated.
- Color Half the Dough: I remove about half of the dough from the bowl. To this portion, I add the red food coloring and mix until it’s well combined. If I’m using liquid food coloring, I add about 1 teaspoon. If it’s gel, I add just a few drops. I add more if the color isn’t as rich as I’d like.
- Chill the Dough: I wrap each portion of dough separately in plastic wrap and press each into a 1-inch thick disk. Then, I refrigerate them for at least 4 hours, or until they are firm to the touch. This dough can be chilled at this stage for up to 3 days.
- Preheat and Prep: When I’m ready to bake, I preheat my oven to 375°F (190°C). I line two baking sheets with parchment paper.
- Shape the Candy Canes: I cut each chilled dough disk into 1-inch cubes. Then, I roll each cube into a ball. On a lightly floured surface, I gently roll the dough balls into 5-inch-long ropes by rolling the ball up and down on the counter with my palm.
- Twist and Shape: I place two ropes side by side and carefully twist them together. To create the candy cane shape, I curve one end down an inch or so to form the handle. I place the shaped cookies on the prepared baking sheets about 1 inch apart.
- Bake and Decorate: I bake the cookies for 10 minutes, or until they appear dry. Immediately after taking them out of the oven, I sprinkle them with the crushed peppermint candies. I let them cool on the baking sheet for a few minutes before transferring them to a wire rack to cool completely.
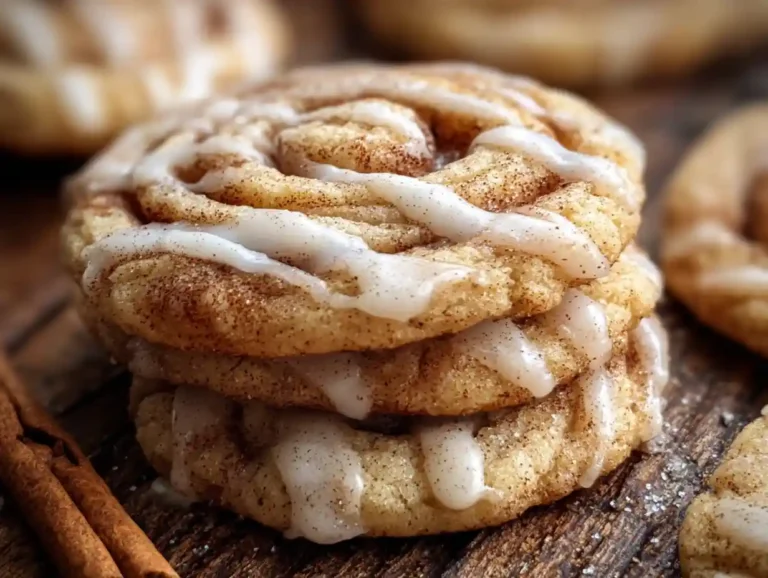
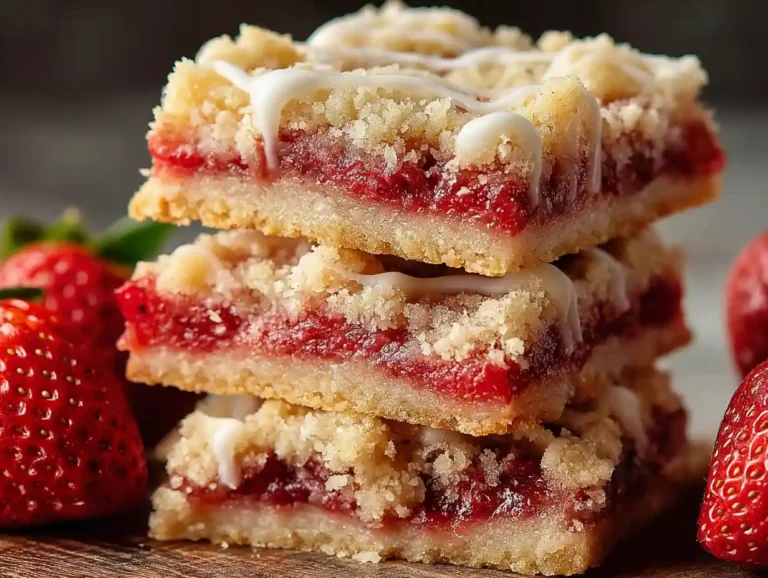
These cookies are a wonderful treat, but if you’re looking for more holiday treats be sure to try this Wonderful Christmas Cranberry Bars Recipe.
Troubleshooting Guide
Even the best baking adventures can hit a snag. Here are a few common issues and how I tackle them:
- Cookies spreading too thin: This can happen if the butter is too soft, or the dough wasn’t chilled long enough. Ensure your butter is just softened, not melted, and chill the dough until it’s very firm. You can also add an extra tablespoon or two of flour if the dough feels too soft.
- Dough being too dry or too sticky: If the dough is too dry and crumbly, add a teaspoon of milk or water at a time until it comes together. If it’s too sticky, gradually add a little more flour.
- Candy canes losing their shape during baking: Make sure the dough is well-chilled before shaping. If the dough becomes too soft while you’re working with it, return it to the refrigerator for a bit. Ensure you’re baking them on parchment paper, which helps prevent sticking and spreading.
- Color bleeding or fading: Using gel food coloring typically yields more vibrant and less bleeding colors than liquid. Ensure the two colored doughs are firmly pressed together when twisting.
- Cookies being too hard or too soft: Baking time is key here. For softer cookies, bake closer to the 8-minute mark and let them cool on the sheet for a bit longer. For crispier cookies, bake closer to 10-12 minutes.
Flavor Variations
If you’re looking to shake things up, here are a few delicious twists on the classic:
| Variation | Description | Instructions |
|---|---|---|
| Chocolate Candy Cane Cookies | Adding cocoa powder for a rich chocolate flavor. | Add ¼ cup unsweetened cocoa powder to the dry ingredients. |
| Vanilla Bean Candy Cane Cookies | Infusing the cookies with the complex flavor of vanilla bean. | Add the seeds scraped from one vanilla bean to the wet ingredients along with the vanilla extract. |
| Almond Extract | Substitute Peppermint extract for almond extract for a nutty flavor. | Replace the peppermint extract with the same amount of almond extract. |
Decoration Ideas
Beyond the classic crushed peppermint, there are so many fun ways to decorate these cookies:
- Dipping in Melted Chocolate: Dip the ends or the entire cookie in melted white or dark chocolate for an extra decadent touch.
- Royal Icing Designs: Use a simple royal icing to pipe intricate patterns, outlines, or even small festive images onto the cookies.
- Sprinkles or Edible Glitter: Add a festive shimmer with edible glitter or a sprinkle of colorful holiday sprinkles before the cookies fully set.
- Peppermint Bark Effect: Drizzle melted chocolate over the cooled cookies and sprinkle with more crushed peppermint for a “peppermint bark” inspired look.
If you’re looking for a festive drink to serve along with these delightful cookies, consider trying this An Amazing Grinch Punch Recipe For The Holidays.
Pro Tips for Perfect Candy Cane Cookies
Want to elevate your candy cane cookies to the next level? Here are a few tips I’ve learned:
- Preventing Color Bleed: For the most vibrant stripes, ensure both doughs are very cold and firm before twisting. Press the two ropes together firmly along their length as you twist.
- Vibrant Red Color: Gel food coloring is your best friend for achieving a deep, rich red without adding too much liquid, which can affect the dough’s consistency. Start with a few drops and add more until you reach your desired shade.
- Texture Control: For a softer cookie, slightly reduce the baking time and let them cool on the baking sheet for a few extra minutes. For a crisper cookie, bake them for the full 10 minutes or slightly longer, and ensure they cool completely on a wire rack.
Storage Instructions
Once completely cooled, I store my candy cane cookies in an airtight container at room temperature. They’ll stay fresh and delicious for about 5-7 days. If you’re stacking them, placing a piece of parchment paper between layers can prevent them from sticking together.
Freezing Instructions
These cookies freeze beautifully, both before and after baking. If you’re looking for more bakes and sweets, be sure to check out our Bakes and Sweets Category.
- Freezing Dough: After shaping the candy canes, place them on a parchment-lined baking sheet and freeze until firm. Once solid, transfer them to a freezer-safe bag or container, separating layers with parchment paper. They can be stored for up to 2-3 months. Bake directly from frozen, adding a few extra minutes to the baking time.
- Freezing Baked Cookies: Ensure the cookies are completely cooled. Arrange them in a single layer on a baking sheet and freeze until firm. Then, transfer them to an airtight freezer-safe container or bag, again using parchment paper between layers. Baked cookies can be stored for up to 3 months. Thaw them at room temperature.
To prevent freezer burn, make sure your containers or bags are well-sealed and that as much air as possible is removed.
Frequently Asked Questions
I often get asked about variations and common baking concerns, so here are a few answers:
Can I use a different type of flour?
While all-purpose flour is ideal for this recipe’s texture, you can experiment. Using cake flour might result in a more tender cookie, while bread flour could lead to a chewier texture.
Can I make these cookies without peppermint extract?
Absolutely! You can substitute it with an equal amount of vanilla extract for a classic sugar cookie, or try almond extract for a different nutty flavor profile.
How do I prevent the sugar from melting during baking?
The crushed peppermint candy is added immediately after baking while the cookie is still warm. This allows the candy to melt slightly and adhere to the cookie. If it’s melting too much or spreading out excessively, ensure your dough is well-chilled before baking.
Are these cookies gluten-free/vegan?
This recipe, as written, is not gluten-free or vegan. To make them gluten-free, you would need to use a good quality gluten-free all-purpose flour blend that contains xanthan gum. For vegan cookies, you would replace the butter with vegan butter sticks and the egg with a flax egg or other vegan binder. The texture may vary slightly.
Conclusion
Creating these Candy Cane Cookies has always been a cherished holiday ritual for me, and I hope this recipe brings that same joy to your kitchen. The delightful minty flavor, the festive look, and the fun of shaping them make them a perfect project for bakers of all ages. They’re a charming addition to any holiday celebration or a thoughtful homemade gift.
I can’t wait for you to try them! Let me know in the comments below how your Candy Cane Cookies turned out. Did you try any of the flavor variations or decoration ideas? I’d love to hear all about your baking adventures! Don’t forget to share your beautiful cookie photos on social media and tag me using #DelishScriptHolidayBakes!