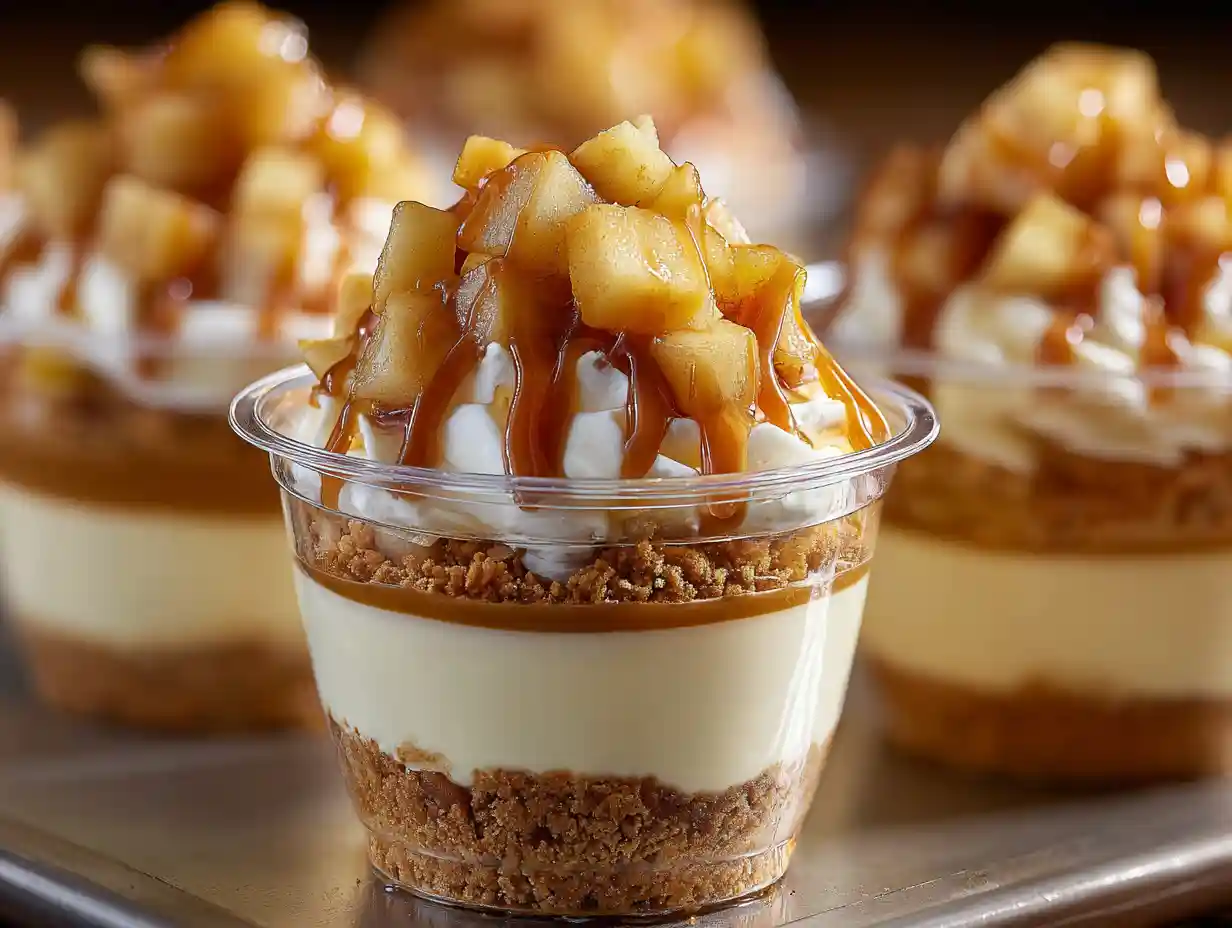
Hey there, dessert lovers! Maya from Delish Script here. I’m so excited to share my super simple and totally delicious Caramel Apple Dessert Cups recipe. These are the perfect treat for any occasion; I love making them for parties, potlucks, or even just a cozy night in.
Best of all, they’re quick to make, with just about 20 minutes of prep time plus chilling. Let’s dive into this easy recipe!
Table of Contents
Why You’ll Love This Caramel Apple Dessert Cups Recipe
- Quick and Easy: I know we’re all busy, so I made sure this recipe is super fast to put together.
- Perfect for Parties: Individual dessert cups are always a hit! No slicing or serving required; just grab and go.
- Customizable: You can easily swap out ingredients to suit your tastes or dietary needs.
- Make-Ahead Friendly: I love that you can prep all the components in advance and assemble them later.
Key Ingredients for Caramel Apple Dessert Cups
- Apples (4 cups, peeled and chopped): The star of the show! I recommend using a mix of sweet and tart apples for the best flavor. More on apple selection later!
- Light Brown Sugar (½ cup): Adds sweetness and a hint of molasses flavor to the apple mixture.
- Cinnamon (1 tsp): Warm spice that complements the apples perfectly.
- Vanilla Wafer Crumbs (2 cups): Creates a delicious and easy crust. If you need a gluten-free option, use gluten-free vanilla wafers.
- Salted or Unsalted Butter (¼ cup, melted): Binds the crust together and adds richness.
- Instant Vanilla Pudding Mix (3.4 ounces): Helps create a creamy and stable mousse.
- Milk (1 cup): Used to make the vanilla pudding.
- Salted Caramel Sauce (⅓ cup, plus more for garnish): Adds a decadent caramel flavor to the mousse.
- Heavy Cream (1 ½ cups): Whipped to create a light and airy mousse.
Tools & Supplies
Here are the essential tools and supplies I use for this recipe:
- Mixing Bowls: For preparing the apple mixture, crust, and mousse.
- Saucepan: To cook the apple mixture.
- Cookie Scoop: Makes portioning the crust easy and consistent.
- Piping Bag: For neatly piping the caramel mousse into the cups.
- 2-ounce Plastic Cups: Perfect for individual servings.
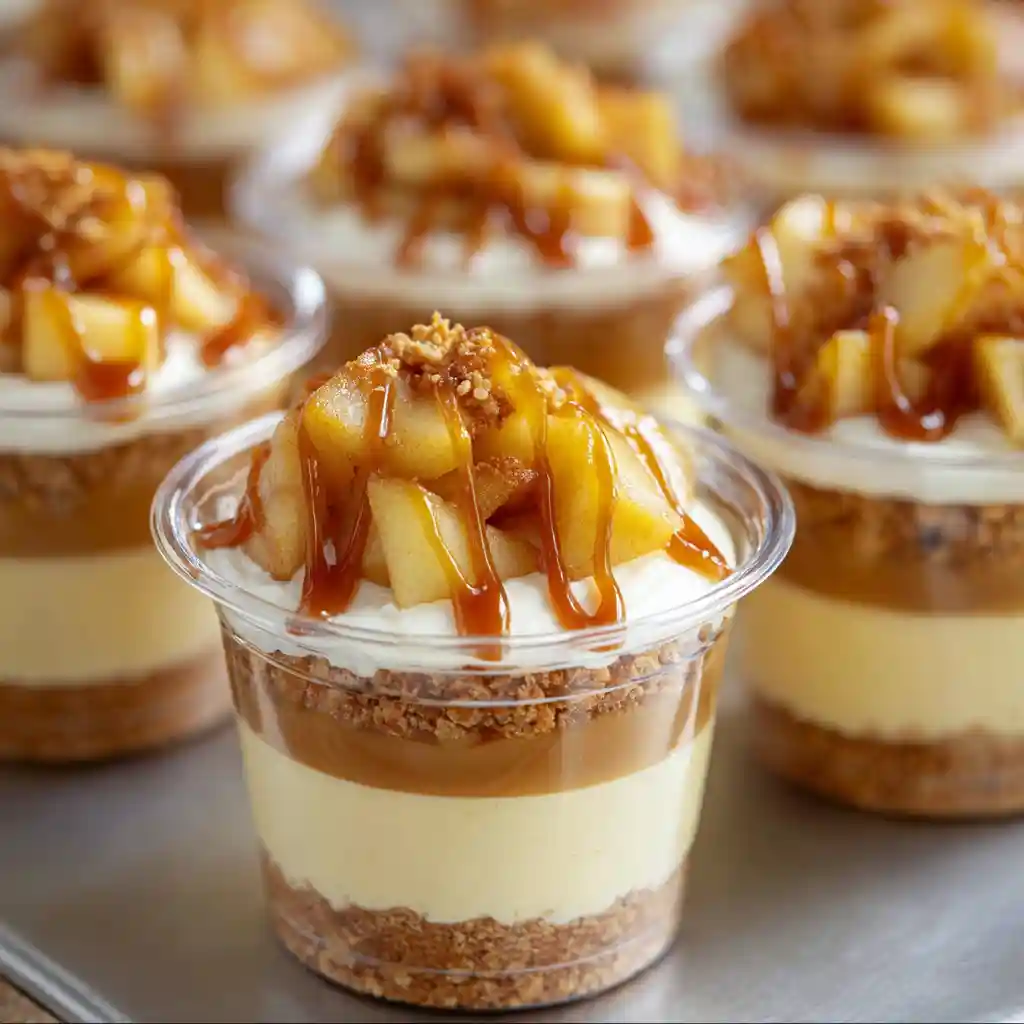
How to Make Caramel Apple Dessert Cups: Step-by-Step
- In a medium saucepan, combine peeled and chopped apples, brown sugar, and cinnamon.
- Stir and cook over medium heat until the apples are soft and the liquid thickens. Set aside to cool.
- In a mixing bowl, combine vanilla wafer crumbs and melted butter.
- Stir until fully incorporated.
- Portion vanilla wafer crumbs into 28 – 2 ounce plastic cups. I recommend using a small cookie scoop.
- Use the back of one of the plastic cups to press the crumbs down to create the crust.
- In a large mixing bowl, combine instant vanilla pudding mix and milk.
- Whisk to combine. Chill for 5 minutes.
- Add salted caramel sauce to the vanilla pudding mixture.
- Use an electric hand mixer on medium speed to mix the caramel into the pudding until smooth.
- Pour in the heavy cream to the pudding mixture.
- Whip with an electric hand mixer for 3-5 minutes until it becomes thick and creamy.
- Transfer the caramel mousse mixture to a large piping bag. Pipe the mousse into the plastic cups on top of the vanilla wafer crust.
- Using a spoon, portion the cinnamon apples over the caramel mousse. Drizzle with additional caramel sauce if desired.
- Seal the cups with a lid and chill. The cups can be served immediately or stored in the refrigerator for 2 to 3 days.
Apple Selection: Choosing the Best Apples
Choosing the right apples can make a big difference in this recipe. I personally love using a mix of sweet and tart varieties to balance the flavors.
- Honeycrisp: These are crisp, sweet, and juicy, making them a great all-around choice.
- Granny Smith: These tart apples add a nice tang that cuts through the sweetness of the caramel.
- Gala: These are sweet and mild, with a pleasant flavor.
Making Your Own Salted Caramel Sauce (Optional)
While store-bought salted caramel sauce works great in this recipe, I know some of you might prefer making your own. Here’s a basic recipe:
- In a medium saucepan, melt 1 cup of granulated sugar over medium heat, stirring constantly until it turns into a golden amber color.
- Carefully whisk in ½ cup of heavy cream (it will bubble up!).
- Remove from heat and stir in 4 tablespoons of salted butter and 1 teaspoon of sea salt.
- Let it cool slightly before using.
For a bourbon caramel variation, add 1-2 tablespoons of bourbon after removing the caramel from the heat.
For another delightful fall treat, check out this recipe for Ultimate Pumpkin Spice Hot Chocolate Recipe.
Variations: Dietary Needs, Flavors & Presentation
Want to mix things up? Here are a few ideas:
| Variation | Substitution/Addition | Notes |
|---|---|---|
| Vegan | Use vegan vanilla wafers, plant-based butter, coconut milk for the pudding, and vegan caramel. | Ensure your caramel sauce is also vegan-friendly. |
| Nut-Free | Double-check all ingredients to ensure they are processed in a nut-free facility. | This recipe is naturally nut-free, but always be cautious about cross-contamination. |
| Different Spices | Add a pinch of nutmeg or ginger to the apple mixture. | Experiment with different spice combinations to find your favorite. |
| Holiday Themes | Use holiday-themed sprinkles or food coloring in the mousse. | For Christmas, try red and green sprinkles. For Halloween, use orange and black. |
| Caramel Swirls | Swirl extra caramel sauce into the mousse before chilling. | This adds a beautiful visual effect and intensifies the caramel flavor. |
Troubleshooting Caramel Mousse
Sometimes, mousse can be tricky. Here are a few common issues and how to fix them:
- Too Runny: If your mousse is too runny, try chilling it for a longer period. You can also add a bit more whipped cream to thicken it.
- Too Thick: If the mousse is too thick, add a tablespoon of milk at a time until you reach the desired consistency.
- Grainy: This can happen if the pudding mix isn’t fully dissolved. Make sure to whisk it well with the milk before chilling.
Make-Ahead Instructions
This Caramel Apple Dessert Cups recipe is perfect for making ahead!
- Apples: The apple mixture can be made 2-3 days in advance and stored in the refrigerator.
- Crust: The vanilla wafer crust can be prepared a day in advance and stored in an airtight container.
- Mousse: The mousse is best made the day you plan to assemble the cups, but it can be stored in the refrigerator for up to 24 hours.
- Assembly: I recommend assembling the cups a few hours before serving to allow the flavors to meld.
Consider some other great options from our bakes-sweets category for your next gathering.
Storing and Serving Your Caramel Apple Dessert Cups
Once assembled, these dessert cups should be stored in the refrigerator. They will last for 2 to 3 days. To prevent the crust from getting soggy, make sure the apple mixture has cooled completely before assembling the cups.
I also recommend adding a small piece of parchment paper between the crust and the apple filling to create a barrier. Serve them chilled for the best flavor and texture. A sprinkle of cinnamon on top is always a nice touch!
Tips for Making Caramel Apple Dessert Cups with Kids
This is a fun recipe to make with kids! Here are some ways they can help:
- Peeling and Chopping Apples: Kids can help peel the apples (with supervision) and chop them into small pieces.
- Making the Crust: They can help crush the vanilla wafers and mix them with the melted butter.
- Assembling the Cups: Kids can help layer the crust, mousse, and apple mixture into the cups.
- Adding Sprinkles: Let them decorate the cups with sprinkles or a drizzle of caramel sauce.
Adults should handle the hot saucepan and the electric mixer. If you’re planning a spooky get together, don’t miss our recipe for Wicked Witches Brew Mocktail: Easy Halloween Magic.
FAQs about Caramel Apple Dessert Cups Recipe
What is the best way to prevent the vanilla wafer crust from getting soggy?
Make sure the apple mixture is completely cooled before assembling the cups. You can also add a small piece of parchment paper between the crust and the apple filling to create a barrier.
Can these be made without pudding mix? What are the alternative thickening agents?
Yes, you can use cornstarch or gelatin as an alternative thickening agent. You’ll need to experiment with the quantities to achieve the right consistency.
How can you adapt this to different holidays by using themed sprinkles, caramel colors, or apple varieties?
Get creative with your decorations! Use holiday-themed sprinkles, food coloring in the mousse, or different apple varieties to match the season. Red and green sprinkles for Christmas, orange and black for Halloween, etc.
While store-bought salted caramel sauce works great in this recipe, I know some of you might prefer making your own. Here’s a basic recipe:
- In a medium saucepan, melt 1 cup of granulated sugar over medium heat, stirring constantly until it turns into a golden amber color.
- Carefully whisk in ½ cup of heavy cream (it will bubble up!).
- Remove from heat and stir in 4 tablespoons of salted butter and 1 teaspoon of sea salt.
- Let it cool slightly before using.
Nutrition facts for similar desserts, like apple caramel cake, show around 360 calories per serving. For a bourbon caramel variation, add 1-2 tablespoons of bourbon after removing the caramel from the heat.
If you need a refreshing beverage to pair with it, try our The Wicked Poisoned Apple Cider Mocktail Recipe.
Conclusion
I hope you love this Caramel Apple Dessert Cups recipe as much as I do! It’s easy, delicious, and perfect for any occasion. Don’t forget to leave a comment below if you try it out. I can’t wait to hear what you think! And if you have any questions, please don’t hesitate to ask. Happy baking!
Love this recipe? Follow us on Pinterest for daily food ideas!
The Ultimate Caramel Apple Dessert Cups Recipe
Ingredients
Equipment
Method
- In a medium saucepan, combine peeled and chopped apples, brown sugar, and cinnamon. Stir and cook over medium heat until the apples are soft and the liquid thickens. Set aside to cool.
- In a mixing bowl, combine vanilla wafer crumbs and melted butter. Stir until fully incorporated.
- Portion vanilla wafer crumbs into 28 – 2 ounce plastic cups. I recommend using a small cookie scoop. Use the back of one of the plastic cups to press the crumbs down to create the crust.
- In a large mixing bowl, combine instant vanilla pudding mix and milk. Whisk to combine. Chill for 5 minutes.
- Add salted caramel sauce to the vanilla pudding mixture. Use an electric hand mixer on medium speed to mix the caramel into the pudding until smooth.
- Pour in the heavy cream to the pudding mixture and whip with an electric hand mixer for 3-5 minutes until it becomes thick and creamy.
- Transfer the caramel mousse mixture to a large piping bag. Pipe the mousse into the plastic cups on top of the vanilla wafer crust.
- Using a spoon, portion the cinnamon apples over the caramel mousse. Drizzle with additional caramel sauce if desired.
- Seal the cups with a lid and chill. The cups can be served immediately or stored in the refrigerator for 2 to 3 days.