
Introduction
There’s something truly special about creating a themed treat that brings a smile to everyone’s face, especially when it’s for a special occasion. As someone who loves a good baking project, I’ve found that a bit of creativity can transform a simple classic into something memorable.
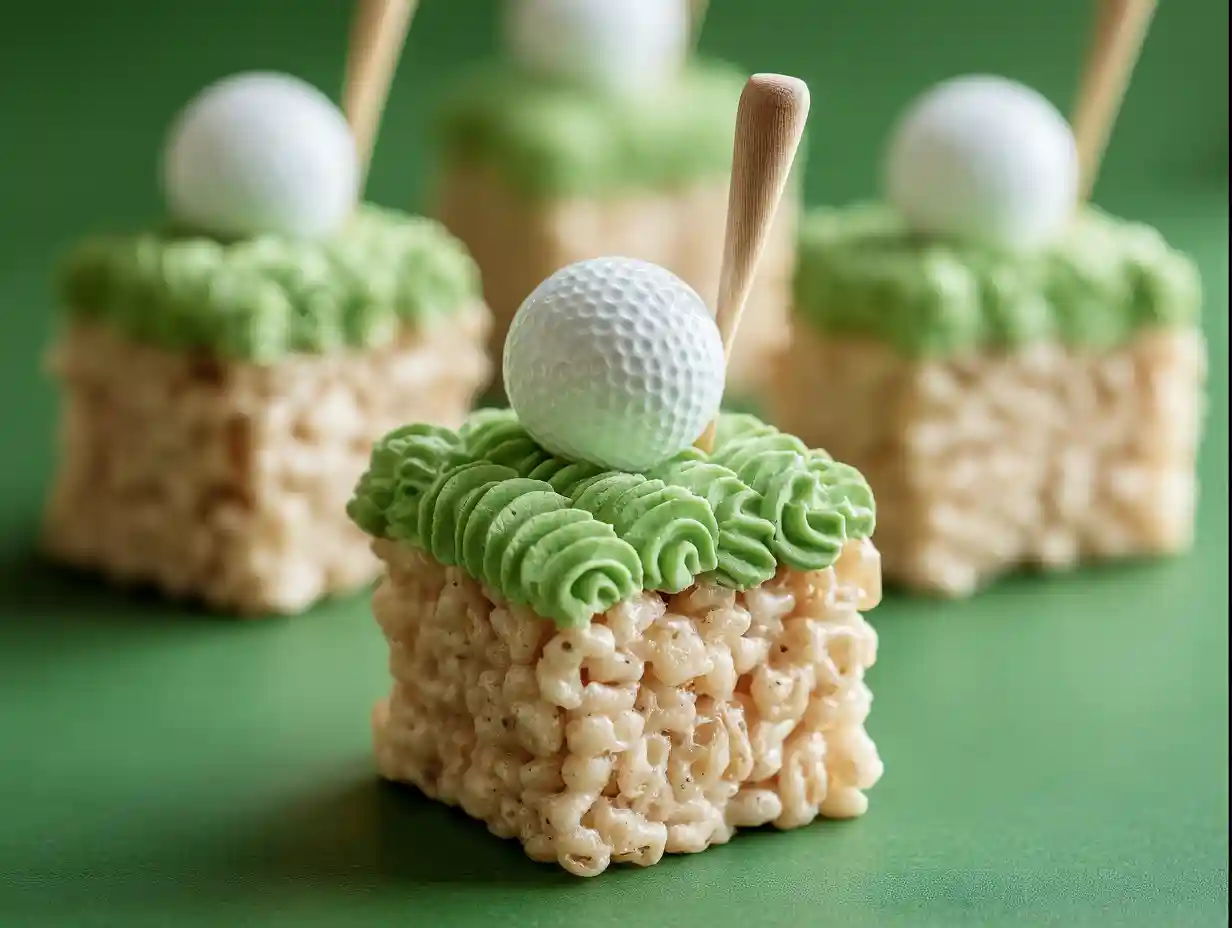
Today, I’m thrilled to share a recipe that’s perfect for any golf enthusiast or for adding a unique touch to your next party: these delightful Golf Theme Rice Krispie Treats! They’re a fun way to bring the spirit of the golf course right into your kitchen, and the best part? They’re incredibly easy to whip up, even if you’re new to baking.
Table of Contents
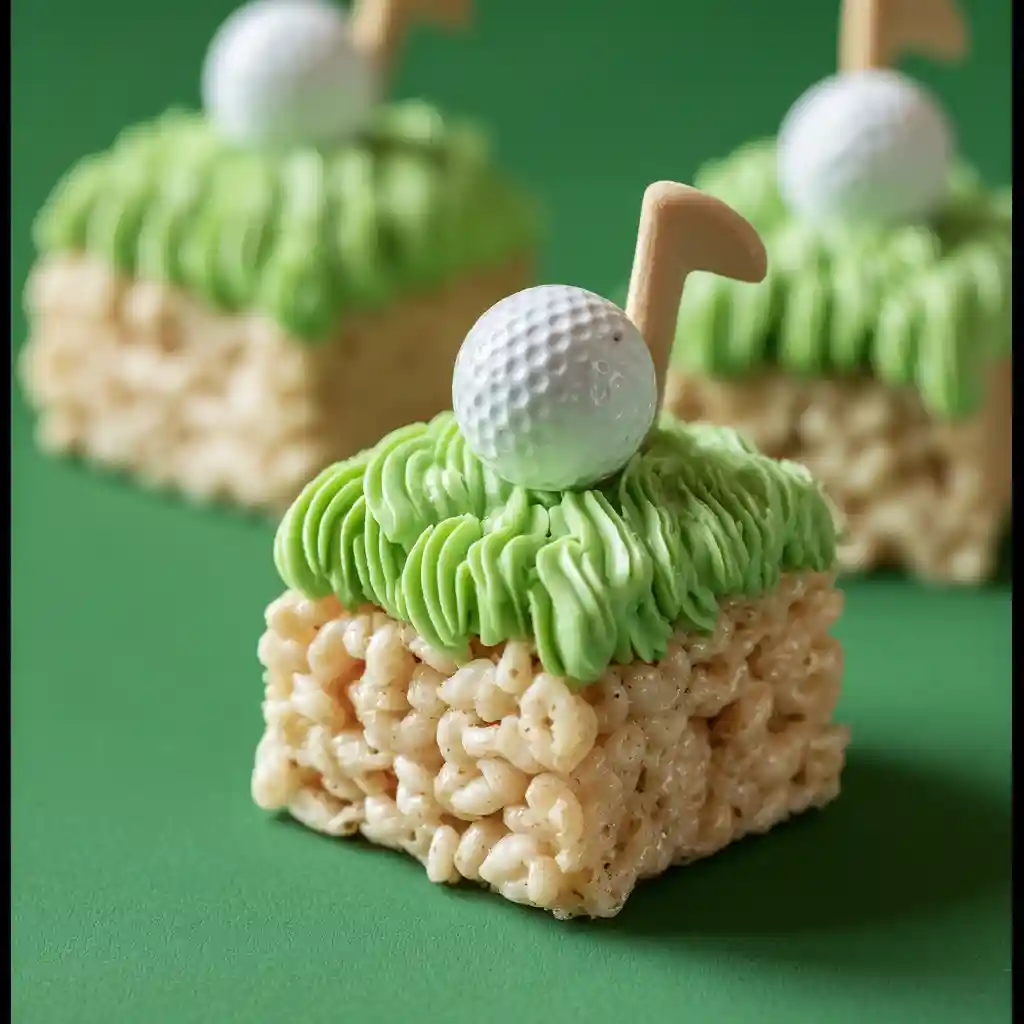

Amazing Golf Theme Rice Krispie Treats
Ingredients
Equipment
Method
- First, I like to prepare my pan. Spray a 9×9 pan with a non-stick coating spray and set it aside. This prevents sticking later on.
- In a large saucepan, I melt the butter over low heat. Keeping the heat low ensures it doesn’t burn.
- Next, I add the marshmallows to the melted butter, stirring constantly until they are completely melted and smooth.
- Once the marshmallows are melted, I remove the pan from the heat. Then, I stir in the Rice Krispies cereal and salt (if you’re using it) until everything is coated evenly.
- Now, I transfer the cereal mixture into the prepared 9×9 pan. It’s important to press it down firmly and evenly.
- Allow the treats to cool in the pan for at least 30 minutes before moving on to decorating. Patience here will make them easier to handle.
- For the golf balls, I melt the white chocolate melts in a double boiler. Once melted and smooth, I let them cool for just about 1 minute so they don’t melt the plastic molds.
- Carefully pour the melted white chocolate into your golf ball molds. Then, place these in the refrigerator for about 30 minutes, or until they are completely hardened.
- While the golf balls are chilling, line a cookie sheet with wax paper and set it aside. This will be where your decorated treats cool.
- In a small, microwave-safe bowl, add the dark green chocolate melts. Microwave them in 45-second intervals, stirring well after each, until they are fully melted and smooth.
- Once your white chocolate golf balls have hardened, take your Rice Krispie treat base and cut it into bars. Dip six of these bars into the melted dark green chocolate, coating them evenly.
- Place the chocolate-coated bars onto the prepared wax paper-lined cookie sheet. Immediately, place a hardened white chocolate golf ball on top of each bar.
- Let the bars and golf balls “set” for at least 30 minutes. This allows the chocolate to harden completely.
- Now, repeat steps 10 through 12, but this time use the lime green chocolate melts for dipping your remaining Rice Krispie bars and topping them with white chocolate golf balls.
- ENJOY! Your delicious and fun golf-themed treats are ready to be served.
Nutrition
Notes
Tried this recipe?
Let us know how it was!Why You’ll Love These Golf Theme Rice Krispie Treats
- Effortless Assembly: Even if you’re a beginner baker, you’ll find these treats a breeze to make. The steps are straightforward and don’t require any fancy equipment.
- Perfect for Any Golf Event: Whether it’s Father’s Day, a birthday celebration, a golf tournament, or a casual viewing party, these treats are a guaranteed hit.
- Customizable Fun: You can easily adapt the colors and decorations to match your specific theme or preferences, making each batch uniquely yours.
- Crowd-Pleasing Delight: Who can resist a classic Rice Krispie treat? These fun, themed versions are sure to be gobbled up by guests of all ages.
Ingredients for Your Homemade Golf Theme Rice Krispie Treats
Here’s everything you’ll need to create these charming golf-themed treats:
- 1 cup (2 sticks) butter: This is the base that helps melt everything together.
- 2 10 oz bags marshmallows: Make sure they’re fresh for the best texture.
- 10 cups Rice Krispies cereal: The star of our crispy creation!
- ¼ tsp salt: This is optional, but it helps balance the sweetness.
- 1 cup Wilton white chocolate melts: Perfect for creating our little golf balls.
- ½ cup Wilton dark green chocolate melts: To give our treats that signature golf course green.
- ½ cup Wilton lime green chocolate melts: For a lighter, vibrant shade of green.
Step-by-Step: How to Make Golf Theme Rice Krispie Treats (Candy Melt Method)
Let’s get started on these fun treats! Follow these simple steps to create your own batch of golf-themed goodness.
Preparing the Rice Krispie Treat Base
- First, I like to prepare my pan. Spray a 9×9 pan with a non-stick coating spray and set it aside. This prevents sticking later on.
- In a large saucepan, I melt the butter over low heat. Keeping the heat low ensures it doesn’t burn.
- Next, I add the marshmallows to the melted butter, stirring constantly until they are completely melted and smooth.
- Once the marshmallows are melted, I remove the pan from the heat. Then, I stir in the Rice Krispies cereal and salt (if you’re using it) until everything is coated evenly.
- Now, I transfer the cereal mixture into the prepared 9×9 pan. It’s important to press it down firmly and evenly.
- Allow the treats to cool in the pan for at least 30 minutes before moving on to decorating. Patience here will make them easier to handle.
Crafting Your Chocolate Golf Balls
- For the golf balls, I melt the white chocolate melts in a double boiler. Once melted and smooth, I let them cool for just about 1 minute so they don’t melt the plastic molds.
- Carefully pour the melted white chocolate into your golf ball molds. Then, place these in the refrigerator for about 30 minutes, or until they are completely hardened.
Dipping and Decorating Your Golf Theme Treats
- While the golf balls are chilling, line a cookie sheet with wax paper and set it aside. This will be where your decorated treats cool.
- In a small, microwave-safe bowl, add the dark green chocolate melts. Microwave them in 45-second intervals, stirring well after each, until they are fully melted and smooth.
- Once your white chocolate golf balls have hardened, take your Rice Krispie treat base and cut it into bars. Dip six of these bars into the melted dark green chocolate, coating them evenly.
- Place the chocolate-coated bars onto the prepared wax paper-lined cookie sheet. Immediately, place a hardened white chocolate golf ball on top of each bar.
- Let the bars and golf balls “set” for at least 30 minutes. This allows the chocolate to harden completely.
- Now, repeat steps 10 through 12, but this time use the lime green chocolate melts for dipping your remaining Rice Krispie bars and topping them with white chocolate golf balls.
- ENJOY! Your delicious and fun golf-themed treats are ready to be served.
Quick & Easy Golf Course Treats: Decorating Store-Bought Bars
If you’re short on time but still want to create a golf-themed masterpiece, don’t worry! You can easily transform store-bought Rice Krispie treats into charming golf course creations, much like how you might whip up some amazing no-bake cake batter protein bites for another quick treat.
A simple dusting of green sanding sugar or edible green glitter can instantly give them a grassy appearance. You can also use edible markers to draw golf ball dimples or simple flag designs. For a quick golf ball effect, try pressing a mini marshmallow onto the top of each bar before the green sprinkles settle.
Another idea is to drizzle melted green candy melts over the bars and immediately add a white candy-coated chocolate ball before it sets. These methods are fuss-free and deliver big on theme!
Tips for Achieving Perfect Golf Theme Rice Krispie Treats
Working with Rice Krispie treats and melted chocolate can sometimes be a bit tricky, but a few simple tips can make all the difference. When pressing the cereal mixture into the pan, try not to compact it too much; a lighter touch leads to a chewier, less dense treat.
For the chocolate melting, be patient and stir often to avoid scorching, especially with candy melts. If your chocolate seems too thick for dipping, you can add a tiny bit of vegetable shortening or coconut oil to thin it out, but be careful not to add too much, as it can affect the setting. Work relatively quickly when dipping and decorating, as melted chocolate begins to set.
If you find the treats sticking to your hands while pressing, a light spray of non-stick cooking spray on your fingers usually does the trick.
Customizing Your Golf Theme Rice Krispie Treats
The beauty of these treats is how easily they can be personalized. You can get really creative with the flavors and designs, perhaps drawing inspiration from other fun dessert projects like magical Lucky Charms cookies or a rich chocolate mousse!
Ingredient Substitutions & Variations
| Ingredient | Substitution/Variation | Notes |
|---|---|---|
| Rice Krispies | Other puffed cereals (e.g., Chex, Frosted Flakes) | Changes texture slightly. |
| Marshmallows | Marshmallow Fluff | May require adjusting butter quantity for consistency. |
| Food Coloring | Natural food colorings (e.g., spirulina, matcha) | May alter taste slightly, check instructions. |
| Chocolate Melts | White chocolate + food coloring | More control over color, ensure oil-based food coloring. |
Creative Golf Course Ideas
Beyond the basic green grass and white golf balls, you can create a miniature golf landscape. Use crushed Oreo cookies or chocolate sprinkles to create sand traps around your treats. You can even add small flags by attaching paper flags to toothpicks and gently inserting them into the treats.
For a more elaborate setup, consider using different shades of green candy melts or even piping techniques to create greens and fairways. Edible food pens are also great for drawing intricate details like hole cups or scorecards directly onto the chocolate.
Make-Ahead & Storage Tips
These Golf Theme Rice Krispie Treats are fantastic for making ahead, which is always a lifesaver when planning a party. Once they are fully cooled and the chocolate decorations have hardened, I like to store them in an airtight container at room temperature. You can layer them between sheets of wax paper or parchment paper to prevent them from sticking together.
They generally stay fresh and delicious for about 2 to 3 days. Avoid storing them in the refrigerator if possible, as this can sometimes make them a bit too hard. If you must refrigerate them, let them come back to room temperature for about 30 minutes before serving for the best texture.
Serving Suggestions for Your Golf Treats
Presentation really makes these treats shine! Arrange them on a platter decorated with green serving paper or a golf-themed tablecloth. You can group them together to look like a putting green or scatter them around for a more casual feel.
For an extra touch, pair them with other snacks like pretzel sticks (golf clubs!) or small cupcakes decorated with golf ball toppers. If you’re hosting a larger dessert table, these treats add a fun, unique element that’s sure to be a conversation starter alongside other delightful sweets, such as an ultimate Irish cream chocolate mousse or a classic chocolate cake.
FAQs about Golf Theme Rice Krispie Treats
Can I use gluten-free cereal?
Yes, you absolutely can! Many brands now offer gluten-free puffed rice cereal that will work perfectly. Just ensure it’s the crispy, puffed kind.
How long do these treats last?
Stored properly in an airtight container at room temperature, they should stay fresh for about 2 to 3 days.
Can I freeze them?
While not ideal, you can freeze them. Wrap them well in plastic wrap and then place them in an airtight container or freezer bag. Thaw at room temperature before serving. Keep in mind the texture might change slightly.
What if my chocolate melts seize?
Chocolate melts can seize if they come into contact with any moisture. If this happens, try adding a teaspoon of vegetable oil or shortening and stirring vigorously. If they are too far gone, it’s best to start with a fresh batch.
Conclusion
I truly hope you enjoy making and sharing these fun Golf Theme Rice Krispie Treats! They’re a simple yet impressive way to add a special touch to any gathering or just to bring a bit of cheer to your day.
The process is enjoyable, and the result is always a delightful surprise. Give them a try, and don’t be afraid to get creative with your own touches! I’d love to hear about your adventures in making them. Please share your creations, ask any questions you might have, or tell me about any unique twists you’ve added in the comments below!