Hello, I’m so excited to share a recipe that’s perfect for getting into the St. Paddy’s Day spirit! If you’re looking for a show-stopping dessert that’s as easy as it is delicious, these “St Paddy’s Mint Cheesecake Cups” are your answer. They require absolutely no baking and come together in a flash, making them ideal for any last-minute celebration.
Table of Contents
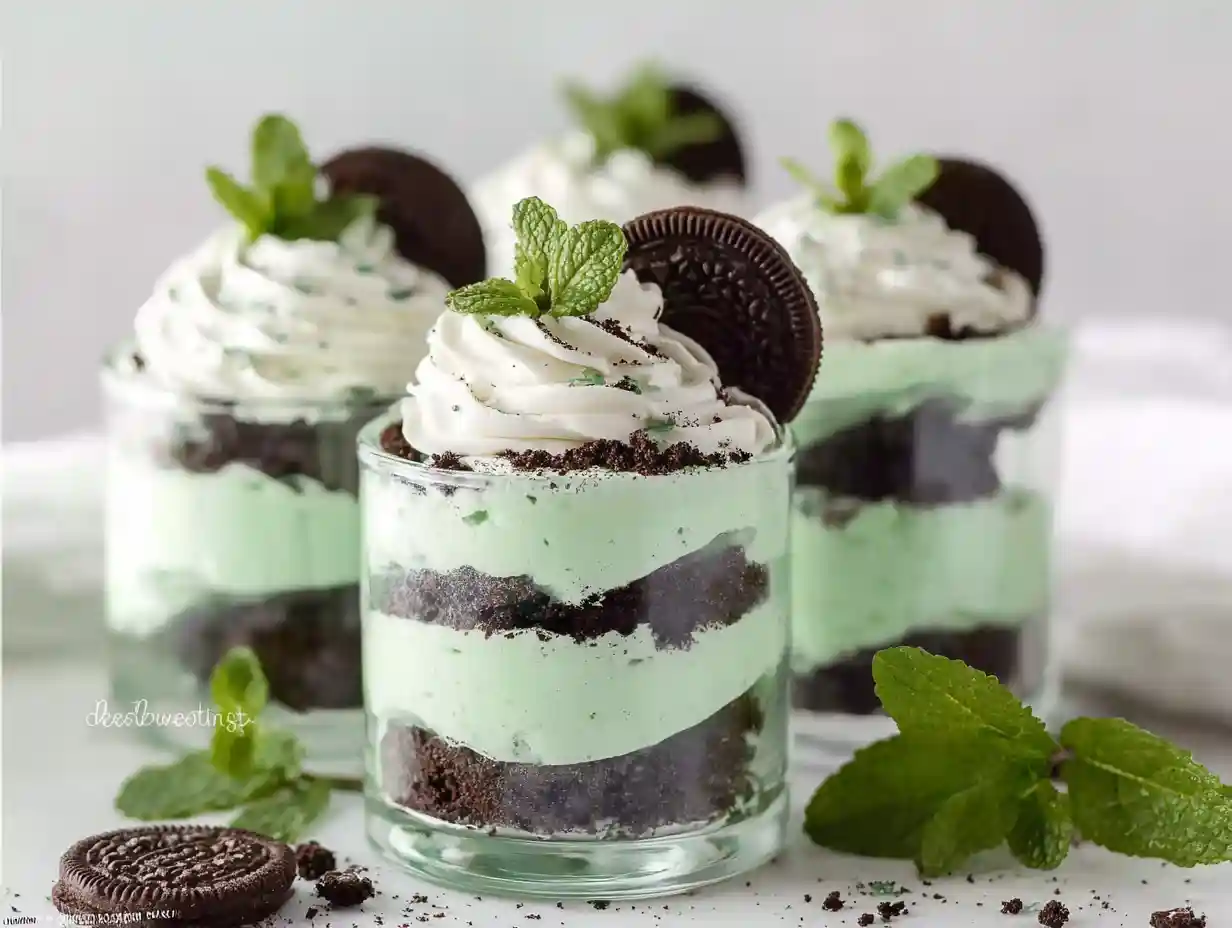
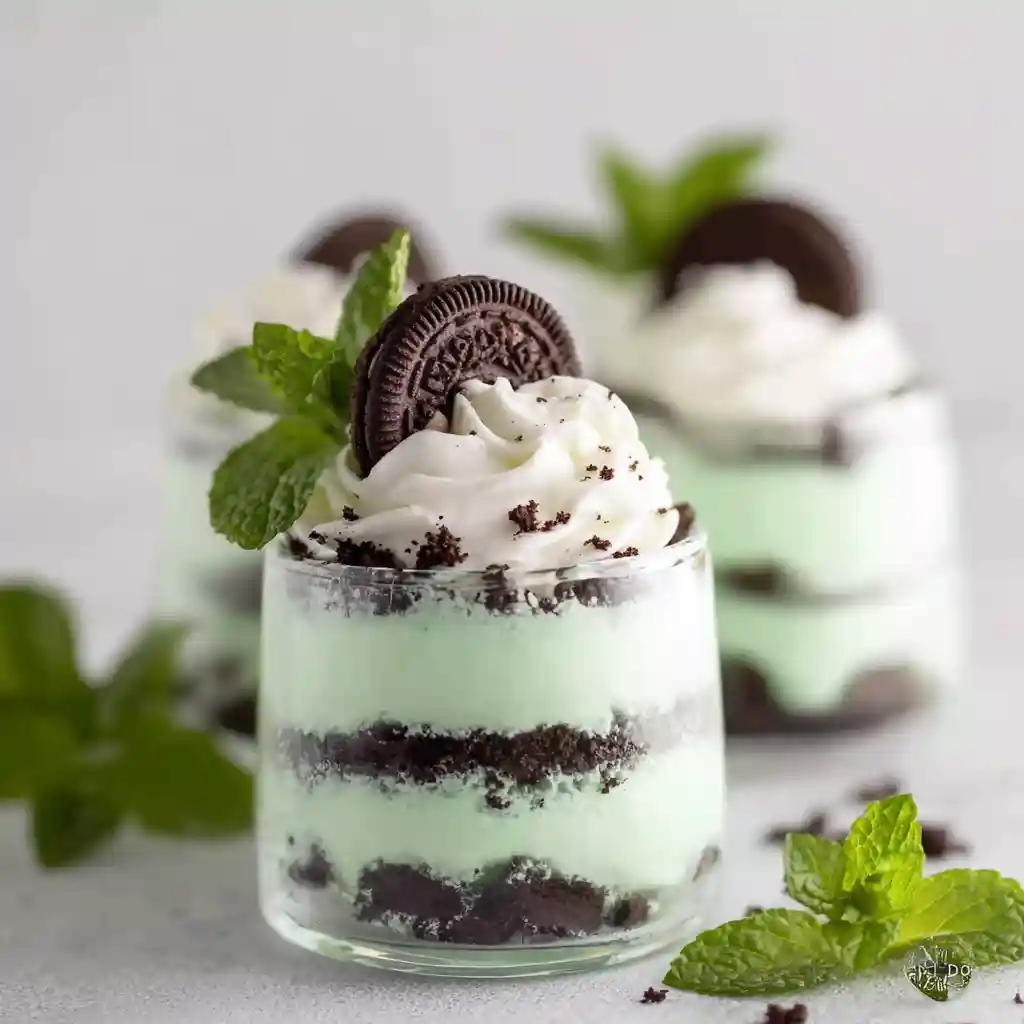
Amazing No-Bake St Paddy’s Mint Cheesecake Cups
Ingredients
Equipment
Method
- Whip your heavy cream until stiff peaks form. I like to pop it in the refrigerator while I prepare the rest of the filling. Remember to set a little aside for topping.
- In your mixer bowl, add the softened cream cheese and beat it for about 1 minute until it’s nice and smooth.
- Add the powdered sugar to the cream cheese and beat until everything is well combined.
- Now, it’s time for the flavor! Add the peppermint and vanilla extracts, along with your green food coloring.
- Mix thoroughly until the cream cheese mixture is a beautiful, uniform green with absolutely no white streaks visible. Be sure to scrape the sides of the bowl as you go.
- Gently fold in the chilled whipped cream and mini chocolate chips. I always use a light hand here to keep the filling airy and light.
- To assemble, start with a layer of cookie crumbs at the bottom of your serving glasses. Then, add a layer of the cheesecake filling. Repeat these layers, finishing with the reserved whipped cream on top. Garnish with an Oreo cookie, a Thin mint cookie, or some Andes mints.
- Refrigerate for at least 2 hours before serving to allow them to set perfectly.
Nutrition
Notes
Tried this recipe?
Let us know how it was!Why You’ll Adore These No-Bake St Paddy’s Mint Cheesecake Cups
- Quick & Effortless: Forget the oven and all the fuss. These cups skip the baking entirely, saving you precious time and effort.
- Perfectly Portioned: Each cup is a delightful individual serving. This means no messy slicing and a guaranteed beautiful presentation for all your guests.
- No Cracks, No Fuss: Baking cheesecake can be tricky. With this no-bake version, you’ll never have to worry about cracks or sunken centers, just pure, smooth perfection.
- Festive & Fun: The vibrant green color and refreshing minty flavor make these a delightful treat for your taste buds and your eyes!
Essential Equipment for Your St Paddy’s Mint Cheesecake Cups (and handy alternatives!)
To whip up these delightful treats, you’ll need a few key items:
- Electric Mixer: For whipping the cream and beating the cream cheese to silky smoothness. If you don’t have one, a sturdy whisk and some arm power will work for the whipped cream, and a strong bowl and spoon can be used for the cream cheese.
- Mixing Bowls: A couple of good-sized bowls will be essential for mixing your ingredients.
- Measuring Cups and Spoons: For accurate ingredient proportions.
- Spatula: Perfect for folding and scraping down the bowl.
- Serving Glasses or Cups: Small glasses, jars, or even pretty plastic cups work wonderfully.
- Food Processor or Ziploc Bag: For crushing your cookies into fine crumbs.
Ingredients You’ll Need
The beauty of these cups lies in their simple yet decadent ingredients. For the best, creamiest texture, I always recommend using full-fat block cream cheese, and for that vibrant green, gel food coloring is your best bet as it gives intense color without thinning out the mixture.
- 10+ Oreo Cookies, crushed into crumbs
- 1 cup heavy cream
- 8 ounces softened cream cheese
- 1 cup powdered sugar
- 1/2 teaspoon peppermint extract
- 1/2 teaspoon vanilla extract
- 2-4 drops green food coloring
- 1 cup mini chocolate chips
How to Make St Paddy’s Mint Cheesecake Cups – Step-by-Step
Creating these festive treats is a breeze. Just follow these simple steps for a delicious result every time!
- Whip your heavy cream until stiff peaks form. I like to pop it in the refrigerator while I prepare the rest of the filling. Remember to set a little aside for topping.
- In your mixer bowl, add the softened cream cheese and beat it for about 1 minute until it’s nice and smooth.
- Add the powdered sugar to the cream cheese and beat until everything is well combined.
- Now, it’s time for the flavor! Add the peppermint and vanilla extracts, along with your green food coloring.
- Mix thoroughly until the cream cheese mixture is a beautiful, uniform green with absolutely no white streaks visible. Be sure to scrape the sides of the bowl as you go.
- Gently fold in the chilled whipped cream and mini chocolate chips. I always use a light hand here to keep the filling airy and light.
- To assemble, start with a layer of cookie crumbs at the bottom of your serving glasses. Then, add a layer of the cheesecake filling. Repeat these layers, finishing with the reserved whipped cream on top. Garnish with an Oreo cookie, a Thin mint cookie, or some Andes mints.
- Refrigerate for at least 2 hours before serving to allow them to set perfectly.
Maya’s Top Tips for Perfect St Paddy’s Mint Cheesecake Cups
I’ve learned a few tricks along the way that I think will really help you nail these cheesecake cups!
- Cream Cheese Matters: For that signature smooth and firm cheesecake texture, always opt for full-fat, block cream cheese. The spreadable kind in tubs has more stabilizers and liquid, which can make your filling too soft. And please, make sure it’s truly softened to room temperature; this is key for beating out any lumps.
- Peppermint vs. Mint Extract: While both are minty, peppermint extract has a slightly sharper, cooler flavor that’s classic for mint chocolate chip desserts. Spearmint extract would give a softer, sweeter mint taste, which is also lovely but not quite the same traditional profile.
- Achieving Vibrant Green: If you want that punchy, festive green, gel food coloring is the way to go. A little goes a long way, and it won’t add unwanted moisture to your filling like liquid coloring can.
- Preventing Soggy Crusts: To keep your cookie crust from getting mushy, press the crumbs down firmly into the bottom of your glasses. You can even pop them in the fridge for about 15 minutes before adding the filling for an extra firm base.
- Troubleshooting: Why Isn’t My Cheesecake Setting?: The most common culprits are under-whipped heavy cream (it needs to hold stiff peaks!), not chilling the cups long enough, or over-mixing the cream cheese filling which can incorporate too much air that then collapses.
- Smooth Layers & Assembly: When adding the cheesecake filling between layers of crumbs, gently press it down with your spoon or spatula. This helps to create an even surface and prevents air pockets that can disrupt your beautiful layers.
Customizing Your St Paddy’s Mint Cheesecake Cups
Get creative and make these cups your own! Here are some fun ideas to play with.
| Customization Option | Ideas & Notes |
|---|---|
| Crust Variations | Use graham cracker crumbs, crushed Thin Mint cookies, chocolate wafers, or gluten-free Oreos for a GF option. |
| Flavor Boosters | Add a splash of Irish cream liqueur (you might need a touch more powdered sugar), orange extract, or a pinch of salt to enhance flavors. |
| Topping & Garnish | Crushed Andes mints, chocolate shavings, extra mini chocolate chips, edible glitter, or a festive shamrock sprinkle. |
| Color Intensity | Adjust green food coloring drops to achieve your desired shade, from pastel mint to deep emerald. |
Make-Ahead & Storage Instructions
These St. Paddy’s Mint Cheesecake Cups are wonderfully make-ahead friendly! I often prepare them a day in advance for parties. Simply cover them tightly with plastic wrap and keep them refrigerated. They’ll stay delicious for up to 3 days. While they can be frozen, the texture of the whipped cream might change slightly upon thawing, so I generally recommend enjoying them fresh from the refrigerator for the best experience.
Serving Suggestions & Presentation Ideas
Presentation truly elevates these already delightful cups! I love piping a swirl of extra whipped cream on top just before serving. For an extra festive touch, try using a small shamrock stencil and dusting with cocoa powder over the whipped cream. A drizzle of chocolate syrup also adds a touch of indulgence.
Scaling Up Your St Paddy’s Mint Cheesecake Cups for a Crowd
Planning a larger gathering? You’ll be happy to know that doubling, tripling, or even quadrupling this recipe is super straightforward. Just multiply all your ingredient quantities accordingly. No tricky adjustments are needed, so you can easily cater to any size crowd with these crowd-pleasing treats.
Frequently Asked Questions (FAQs)
Can I make these St Paddy’s Mint Cheesecake Cups gluten-free?
Absolutely! Simply swap out the Oreo cookies for your favorite gluten-free chocolate sandwich cookies.
Are there dairy-free or sugar-free alternatives for this recipe?
For dairy-free, you could experiment with dairy-free cream cheese and coconut cream, though the texture may differ. Sugar-free would require using a sugar substitute for the powdered sugar and checking the cookie ingredients.
How can I ensure my cheesecake layers are perfectly smooth?
Make sure your cream cheese is fully softened and beat it until completely smooth before adding other ingredients. Gently pressing the filling into the glasses also helps create even layers.
What’s the best way to transport these cheesecake cups to a party?
Place them in a sturdy carrier or a baking pan that fits snugly in your car. Cover them carefully with plastic wrap or a lid to prevent spills.
Can I use a different type of cookie for the crust?
Yes, you can! Graham cracker crumbs, shortbread cookies, or other chocolate wafer cookies all make delicious alternatives to Oreos.
Conclusion
There you have it, my friends! These St Paddy’s Mint Cheesecake Cups are the perfect blend of festive fun, incredible flavor, and ultimate ease. They prove that you don’t need to be a professional baker to create something truly special.
I can’t wait to hear what you think of them! Please leave a comment below with your thoughts, or if you have any questions. And if you make these delightful cups, be sure to share your creations on social media using the hashtag #DelishScriptStPaddys. Happy baking (or rather, no-baking)!