Hey, cookie lovers! I’m so excited to share my favorite Peanut Butter Blossoms recipe with you today. If you’re looking for a classic cookie that’s both nostalgic and incredibly easy to make, you’ve come to the right place.
This recipe comes together in about 30 minutes, from start to finish, making it perfect for a quick baking session.
Table of Contents
Peanut Butter Blossoms
Ingredients
Equipment
Method
- Preheat your oven to 375°F (190°C). Line your cookie sheets with parchment paper for easy removal and cleanup.
- In a large mixing bowl or the bowl of a stand mixer fitted with the paddle attachment, combine the peanut butter, softened unsalted butter, granulated sugar, packed light brown sugar, and salt. Cream these ingredients together by beating on medium speed until they are well combined and smooth.Add the room temperature egg and vanilla extract. Beat again until everything is well combined, then scrape down the sides of the bowl to ensure all ingredients are incorporated.
- Next, add the all-purpose flour and baking soda to the wet ingredients. Beat on low speed just until the flour is combined and you have a cohesive dough. Be careful not to overmix at this stage.
- Scoop the dough into 1-inch balls. If you like, you can roll them in additional granulated sugar for an extra touch of sweetness and sparkle. Place the dough balls onto your prepared baking sheets, leaving about 2 inches between them to allow for spreading.
- Bake for 8 to 10 minutes, or until the cookies appear puffy and have developed cracks on top, with the bottoms just beginning to turn golden brown.
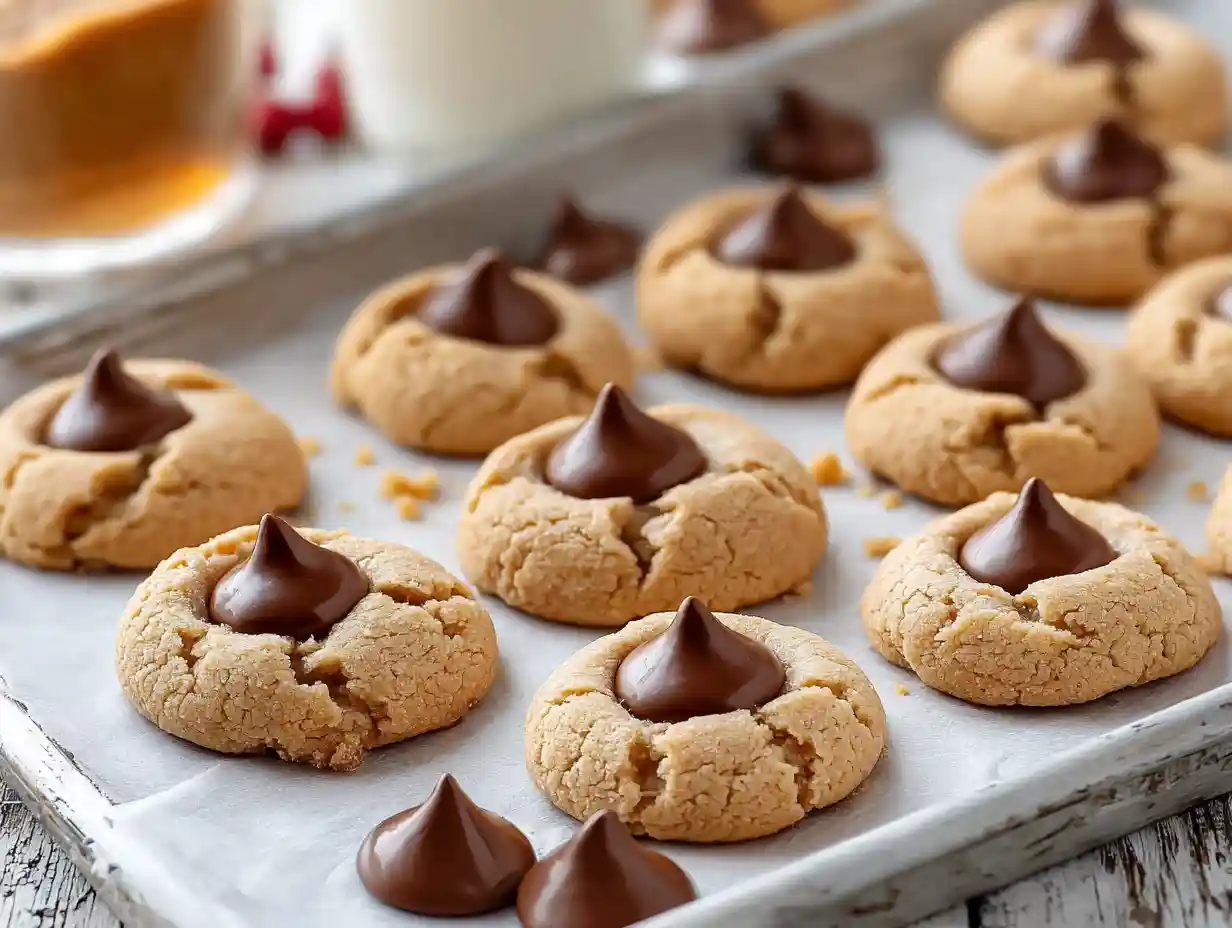
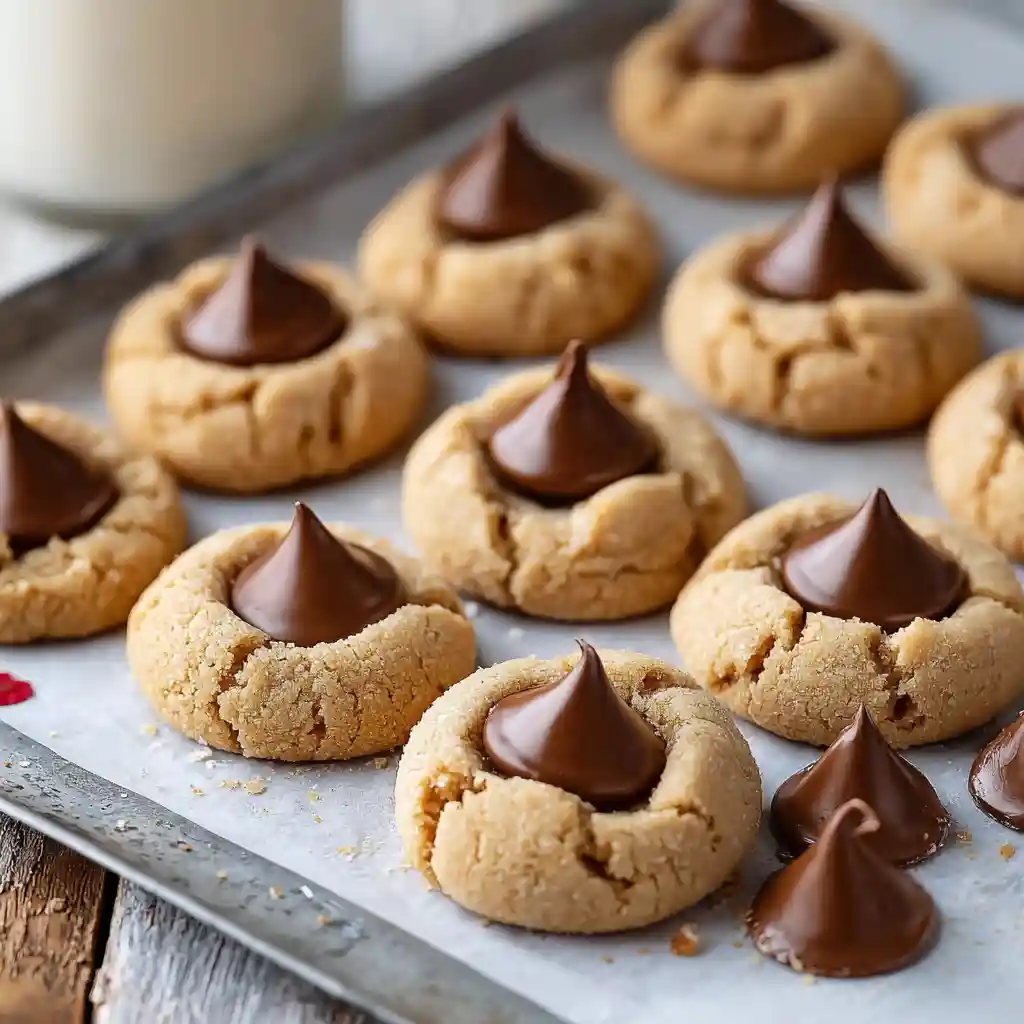
- Immediately after taking the cookies out of the oven, gently press one unwrapped Hershey’s chocolate kiss into the center of each warm cookie. The cookies will likely crack a bit more as you do this, and that’s perfectly okay – it’s part of their charm!
- Allow the cookies to cool completely on the baking sheet. This is important because it lets the chocolate set properly. Once cooled, they are ready to be served or stored in an airtight container for up to 1 week.
Nutrition
Tried this recipe?
Let us know how it was!The History of Peanut Butter Blossoms
Did you know that the iconic Peanut Butter Blossom cookie has a sweet origin story? It was actually created by Mrs. George R. R. Reith for the 1957 Pillsbury Bake-Off contest. While it didn’t win, it quickly became a beloved classic, largely due to its simple yet delightful combination of peanut butter cookie and chocolate kiss.
It’s a recipe that has been bringing smiles to tables for generations. This recipe was inducted into the Pillsbury Bake-Off Hall of Fame in 1999.
Why You’ll Love These Peanut Butter Blossoms
I find that this recipe truly stands out for a few reasons:
- Speedy Sweetness: This recipe is remarkably quick, fitting perfectly into even the busiest schedules. You’ll have warm, delightful cookies ready in no time.
- Effortless Elegance: Despite their charming appearance, these cookies are surprisingly easy to whip up. The simple steps mean less stress and more enjoyment.
- Fewer Messes: By using parchment paper and a straightforward mixing process, I’ve found cleanup to be much simpler with this version.
Ingredients for Perfect Peanut Butter Blossoms
Getting the ingredients just right is key to a delicious cookie. Here’s what you’ll need and why each plays a crucial role:
- ¾ cup creamy peanut butter ((188g)): This is the heart of the cookie, providing that signature rich, nutty flavor and chewy texture. I like to use a standard creamy peanut butter for the best results.
- ½ cup unsalted butter (softened (113g)): Butter adds moisture and helps create a tender crumb. Using unsalted butter allows me to control the salt level in the recipe precisely.
- ½ cup granulated sugar (plus more for rolling (100g)): Granulated sugar contributes to the cookie’s crisp edges and helps them spread. Rolling the dough balls in extra sugar before baking gives them a lovely sparkle and a slightly crunchy exterior.
- ½ cup packed light brown sugar ((110g)): Brown sugar adds moisture and a subtle caramel note, contributing to a chewier cookie.
- ¼ teaspoon salt: Salt balances the sweetness and enhances the peanut butter flavor. Don’t skip it!
- 1 large egg (room temperature): The egg acts as a binder, holding all the ingredients together. Bringing it to room temperature helps it incorporate more smoothly into the dough.
- 1 teaspoon vanilla extract: Vanilla adds a lovely depth of flavor that complements the peanut butter beautifully.
- 1½ cups all-purpose flour ((180g)): Flour provides the structure for the cookies. I stick with all-purpose flour for its reliability.
- ½ teaspoon baking soda: Baking soda is a leavening agent that helps the cookies puff up and spread slightly.
- 36 Hershey’s chocolate kisses (unwrapped): These are the iconic crowning glory! They melt into a luscious topping, creating that classic “blossom” look and taste.
Step-by-Step Instructions: How to Make Peanut Butter Blossoms
Creating these delightful cookies is a straightforward process. Here’s how I make them:
- Preheat your oven to 375°F (190°C). Line your cookie sheets with parchment paper for easy removal and cleanup.
- In a large mixing bowl or the bowl of a stand mixer fitted with the paddle attachment, combine the peanut butter, softened unsalted butter, granulated sugar, packed light brown sugar, and salt. Cream these ingredients together by beating on medium speed until they are well combined and smooth.
- Add the room temperature egg and vanilla extract. Beat again until everything is well combined, then scrape down the sides of the bowl to ensure all ingredients are incorporated.
- Next, add the all-purpose flour and baking soda to the wet ingredients. Beat on low speed just until the flour is combined and you have a cohesive dough. Be careful not to overmix at this stage.
- Scoop the dough into 1-inch balls. If you like, you can roll them in additional granulated sugar for an extra touch of sweetness and sparkle. Place the dough balls onto your prepared baking sheets, leaving about 2 inches between them to allow for spreading.
- Bake for 8 to 10 minutes, or until the cookies appear puffy and have developed cracks on top, with the bottoms just beginning to turn golden brown.
- Immediately after taking the cookies out of the oven, gently press one unwrapped Hershey’s chocolate kiss into the center of each warm cookie. The cookies will likely crack a bit more as you do this, and that’s perfectly okay – it’s part of their charm!
- Allow the cookies to cool completely on the baking sheet. This is important because it lets the chocolate set properly. Once cooled, they are ready to be served or stored in an airtight container for up to 1 week.
Equipment Recommendations
To make your cookie-baking experience even smoother, I often rely on a few key pieces of equipment:
- Stand Mixer: A good stand mixer, like a KitchenAid Artisan Series 5-Quart Tilt-Head Stand Mixer, makes creaming butter and sugar a breeze.
- Cookie Scoop: For uniform cookie size, a Zeroll Original Baker’s Scoop (I use a size 40 or 1 tablespoon size) is indispensable.
- Baking Sheets: Heavy-duty baking sheets, such as Nordic Ware Natural Aluminum Commercial Baker’s Half Sheet, ensure even heat distribution.
- Parchment Paper: Using Reynolds Kitchens Parchment Paper not only prevents sticking but also simplifies cleanup significantly.
Troubleshooting Common Peanut Butter Blossom Problems
Even the best bakers run into occasional cookie conundrums. Here’s how I tackle common issues with Peanut Butter Blossoms:
- Dry, Crumbly Cookies: This often happens if the dough is overmixed or if not enough moisture is present. Ensure your butter and egg are at room temperature. Try adding an extra teaspoon of milk or a bit more peanut butter if the dough seems too dry before baking.
- Melting Chocolate Issues: If your Hershey’s Kisses seem to be melting too much or spreading out oddly, try pressing them into the cookies a minute or two after they come out of the oven, giving them just a moment to cool slightly. Also, ensure your oven temperature is accurate.
- Excessive Spreading: Over-creaming the butter and sugar can incorporate too much air, leading to spread. Also, if your butter is too soft or melted, the cookies will spread more. Make sure your butter is just softened, not greasy.
Peanut Butter Blossom Variations: Get Creative!
While I adore the classic, I love experimenting with different twists on this beloved cookie. Here are a few ideas:
| Variation | Description |
|---|---|
| Different Nut Butters | Try almond butter, cashew butter, or a sunflower seed butter for a unique flavor profile. |
| Spiced Peanut Butter | Add a pinch of cinnamon, nutmeg, or cardamom to the dough for a warm, cozy spice note. |
| Different Chocolate | Swap Hershey’s Kisses for peanut butter cups, Rolos, or even mini chocolate bars for a new candy experience. |
| Peanut Butter Chocolate Chip | Fold in peanut butter chips, semi-sweet chocolate chips, or white chocolate chips into the dough before scooping for added texture and flavor. |
| Gluten-Free | Substitute the all-purpose flour with a good quality gluten-free all-purpose flour blend. You might need to adjust the liquid slightly. |
| Dairy-Free | Use a dairy-free butter substitute and dairy-free chocolate kisses or candies. |
Serving and Gifting Ideas for Peanut Butter Blossoms
These cookies are delightful on their own, but I love presenting them in creative ways. For a fun dessert board, arrange them alongside fresh fruit, other cookies, and a small bowl of extra peanut butter for dipping. A simple dusting of powdered sugar can also add an elegant touch.
When it comes to gifting, these cookies shine. I pack them into festive tins or cellophane bags tied with ribbon. They make wonderful homemade gifts for neighbors, friends, or colleagues, especially during the holidays. Adding a small tag with the baking date is always a nice personal touch.
Peanut Butter Blossoms: Storage Instructions
Storing these cookies properly ensures they stay fresh and delicious. At room temperature, I keep them in an airtight container, and they typically last for up to a week.
For longer storage, you can freeze the baked cookies in a single layer on a baking sheet until firm, then transfer them to a freezer-safe bag or container. They can be kept frozen for up to three months.
Altitude Adjustments for Baking Peanut Butter Blossoms
Baking at higher altitudes can sometimes affect how cookies turn out. If you live above 3,000 feet, you might need to make a few adjustments.
I often find that reducing the leavening agent slightly, like using ¼ teaspoon of baking soda instead of ½ teaspoon, can help prevent over-spreading. You may also need to slightly increase the liquid or flour, depending on your specific altitude.
Frequently Asked Questions
Here are some common questions I get about making Peanut Butter Blossoms:
Can I make the dough ahead of time?
Yes, you can definitely make the dough ahead of time. I wrap it tightly in plastic wrap and refrigerate it for up to 3 days. You might need to let it sit at room temperature for a few minutes before scooping if it’s very firm.
Can I use different candies besides Hershey’s Kisses?
Absolutely! While Hershey’s Kisses are classic, feel free to experiment with other candies like Reese’s Mini Peanut Butter Cups, Rolos, or even M&Ms for a colorful twist. Just ensure they’re about the same size as a Kiss.
How do I prevent the Hershey’s Kisses from melting too much?
Press the Kisses into the cookies immediately after they come out of the oven. The residual heat will soften them enough to stick, but they won’t melt into puddles if you let the cookies cool too much.
How can I prevent dry and crumbly cookies?
Ensure you’re not overbaking the cookies. They should look slightly underdone when you take them out, as they’ll continue to bake on the hot pan. Also, avoid overmixing the dough once the flour is added.
How do I store peanut butter blossoms?
Store them in an airtight container at room temperature. Adding a slice of bread to the container can help keep them soft.
Can I freeze peanut butter blossoms?
Yes, you can freeze baked peanut butter blossoms for up to three months. Ensure they are completely cooled before freezing.
Conclusion
I hope you enjoy these Peanut Butter Blossoms as much as I do! They’re a simple, comforting cookie that always brings a smile. The blend of salty peanut butter and sweet chocolate is simply irresistible, and the crackly texture makes them so inviting. Let me know in the comments if you try them and what variations you made. Happy baking!