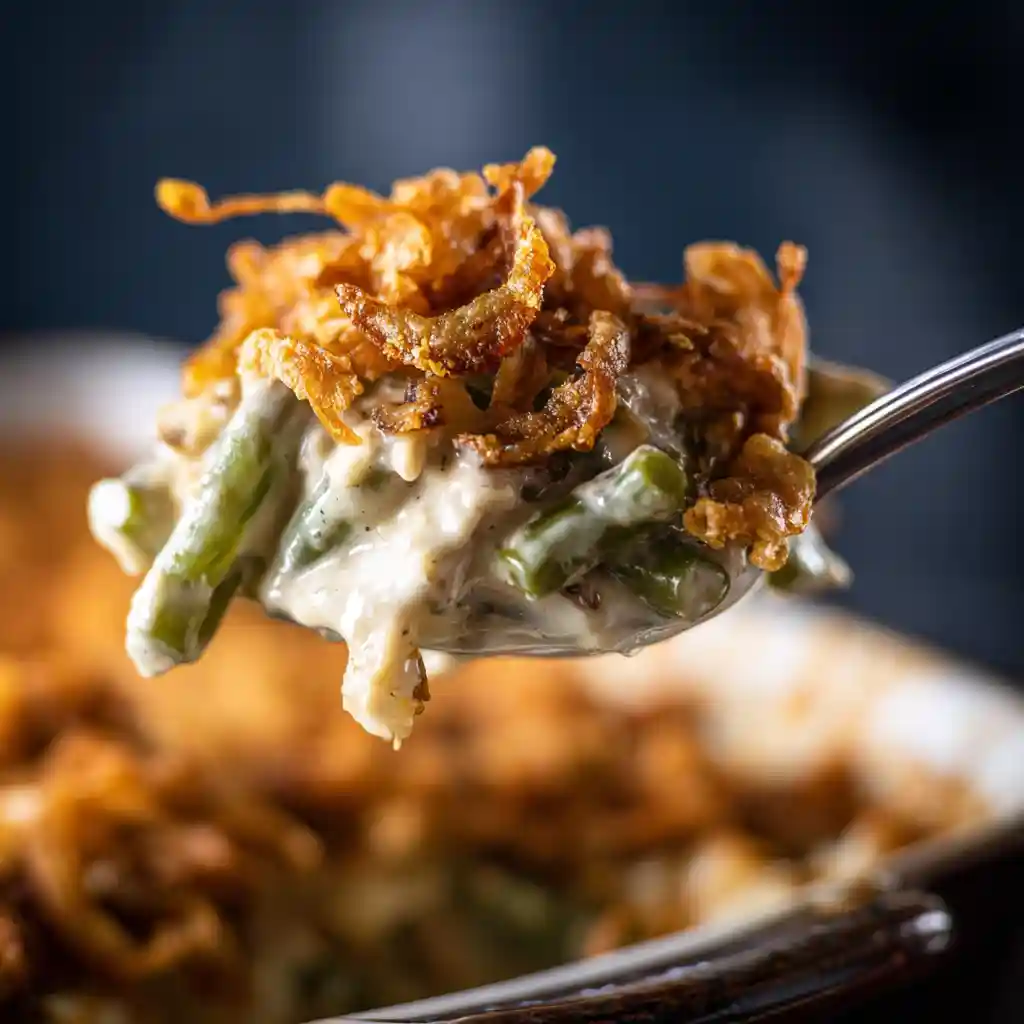
Oh, I absolutely adore this time of year, and one of the things I look forward to most is bringing out my go-to Classic Green Bean Casserole recipe! It’s a dish that just screams comfort and togetherness, and I’m so excited to share my version with you from my kitchen to yours here at Delish Script.
This recipe is designed to give you that perfect, never-soggy, creamy, and crispy result every single time, making it ideal for any occasion, from a casual weeknight dinner to a festive holiday feast.
Table of Contents

Classic Green Bean Casserole
Ingredients
Method
- Preheat the oven to 350°F.
- Bring a medium pot of salted water to a boil. Add the frozen green beans and boil until tender crisp, about 2 to 3 minutes.
- In a large bowl, combine green beans with soup, milk, soy sauce, pepper, salt, 1 cup of crispy onions, and cheese if using (see notes). Transfer to a 2-quart baking dish.
- Bake uncovered for 30 to 35 minutes or bubbly.
- Remove from oven and stir. Top with remaining onions and return to oven for an additional 10 minutes or until golden.
Nutrition
Notes
- Green Beans: I’ve found that using frozen cut green beans gives me the most consistent and best texture. They cook up perfectly tender-crisp without getting mushy. If you prefer to use fresh beans, you’ll need to blanch about 1.5 pounds of fresh, trimmed beans until they are tender-crisp before proceeding. Canned green beans can also work, but I recommend draining them very well and perhaps rinsing them to avoid a metallic taste.
- Cream of Mushroom Soup: The classic canned condensed soup is key here for that traditional flavor and creamy base. You can certainly use a homemade version if you have one you love, or opt for a low-sodium version and adjust the salt to your taste.
- Crispy Fried Onions: These are non-negotiable for that essential crunch! I like to use store-bought crispy fried onions. Make sure you divide them as the recipe instructs, as adding some into the casserole and reserving some for the top creates layers of texture and flavor.
| Problem | Solution |
| Overcooked Beans | Be very precise with the boiling time for frozen beans, aiming for "tender crisp" as they’ll continue to cook in the oven. |
| Soggy Topping | Reserve at least half of your crispy fried onions to add during the last 10 minutes of baking. This keeps them wonderfully crunchy. |
| Bland Casserole | Taste and adjust seasonings (salt, pepper, soy sauce) before baking. Consider adding a pinch of garlic powder or onion powder. |
| Casserole Too Thin | If your sauce seems too thin, it might be from excess water on the beans. Ensure beans are drained well. A bit of extra baking time can also help thicken it. |
| Variation Type | How to Adapt |
| Gluten-Free | Use gluten-free crispy fried onions. For the soup base, you can use a homemade cream of mushroom soup thickened with a gluten-free flour or cornstarch, or a gluten-free condensed soup if available. |
| Vegan | Opt for a vegan cream of mushroom soup (many brands offer this now, or make your own with vegetable broth and cashew cream). Use vegan crispy fried onions and ensure your milk is a dairy-free alternative like unsweetened almond or soy milk. |
| Elevated/Gourmet | Use fresh, high-quality mushrooms (like cremini or shiitake) sautéed with garlic and herbs for your soup base. Top with toasted slivered almonds or Panko breadcrumbs mixed with melted butter instead of fried onions for a different crunch. |
| Flavor Profile: Cheesy | Stir in 1 cup of shredded cheddar, Gruyere, or Monterey Jack cheese into the casserole mixture before baking, and top with more cheese along with the onions for the final bake. |
| Flavor Profile: Spicy | Add a pinch of cayenne pepper or a dash of hot sauce to the casserole mixture for a subtle kick. |
- To Prep Ahead: Assemble the casserole completely (up to step 3), cover it tightly with plastic wrap and then foil, and refrigerate for up to 2 days. When ready to bake, remove the plastic wrap, add the topping (step 5), and bake as directed, adding an extra 5-10 minutes to account for it being cold.
- Storing Leftovers: Once baked, let the casserole cool slightly. Cover it tightly or transfer it to an airtight container and store it in the refrigerator for 3-4 days.
- Freezing: I don’t typically freeze the fully baked casserole as the texture of the onions can change. However, you *can* assemble and freeze the unbaked casserole (up to step 4, but *without* the final onion topping). Thaw in the refrigerator overnight, then bake as directed, adding the final onion topping for the last 10 minutes.
- Reheating: To reheat individual portions, microwave them until warm. For larger amounts, you can reheat in a covered oven-safe dish at 300°F until heated through.
Tried this recipe?
Let us know how it was!Why This Green Bean Casserole Will Be Your New Go-To
I know there are a lot of green bean casserole recipes out there, but I truly believe mine stands out. What makes it so special? Well, I’ve tackled those common kitchen frustrations so you don’t have to!
This recipe guarantees a wonderfully creamy sauce that perfectly coats every bean, and most importantly, it ensures that crispy fried onion topping stays delightfully crunchy, never soggy. You’re going to love the balance of flavors and the satisfying textures this dish offers.
A Taste of History: The Story Behind Green Bean Casserole
It’s fascinating to think about how some of our favorite dishes come to be. The Green Bean Casserole itself has a charming origin story, first appearing in the Campbell’s test kitchen back in 1955.
It was created as a simple, accessible recipe using ingredients readily available in most American households, and it quickly became a beloved classic. I love that it’s a dish with such humble beginnings that brings so much joy to our tables. The creation of this dish is credited to Dorcas Reilly, who was a home economist at Campbell’s.
Essential Ingredients for Your Best Green Bean Casserole
The beauty of this recipe lies in its simplicity. While the ingredient list is short and sweet, understanding each component helps ensure you get the best possible outcome. I’ve listed exactly what I use, and I’ll dive into some options and tips in the notes below.
Ingredients
- 4 cups frozen cut green beans
- 1 (10.5 ounce) can condensed cream of mushroom soup
- ½ cup milk
- 1 teaspoon soy sauce
- ½ teaspoon black pepper
- ¼ teaspoon seasoned salt (more to taste)
- 1½ cups crispy fried onions (divided)
Notes on Ingredients
Let’s talk about making this recipe work for you!
- Green Beans: I’ve found that using frozen cut green beans gives me the most consistent and best texture. They cook up perfectly tender-crisp without getting mushy. If you prefer to use fresh beans, you’ll need to blanch about 1.5 pounds of fresh, trimmed beans until they are tender-crisp before proceeding. Canned green beans can also work, but I recommend draining them very well and perhaps rinsing them to avoid a metallic taste.
- Cream of Mushroom Soup: The classic canned condensed soup is key here for that traditional flavor and creamy base. You can certainly use a homemade version if you have one you love, or opt for a low-sodium version and adjust the salt to your taste.
- Crispy Fried Onions: These are non-negotiable for that essential crunch! I like to use store-bought crispy fried onions. Make sure you divide them as the recipe instructs, as adding some into the casserole and reserving some for the top creates layers of texture and flavor.
Step-by-Step: How to Make Green Bean Casserole
Making this classic dish is incredibly straightforward, and I’m going to walk you through each step. You’ll see how easy it is to achieve that perfect, crowd-pleasing casserole!
Instructions
- Preheat the oven to 350°F.
- Bring a medium pot of salted water to a boil. Add the frozen green beans and boil until tender crisp, about 2 to 3 minutes.
- In a large bowl, combine green beans with soup, milk, soy sauce, pepper, salt, 1 cup of crispy onions, and cheese if using. Transfer to a 2-quart baking dish.
- Bake uncovered for 30 to 35 minutes or bubbly.
- Remove from oven and stir. Top with remaining onions and return to oven for an additional 10 minutes or until golden.
Pro Tips & Troubleshooting for Your Green Bean Casserole
Even the simplest recipes can sometimes present little challenges. I’ve put together some common issues and how I solve them to ensure your casserole is always a hit.
| Problem | Solution |
|---|---|
| Overcooked Beans | Be very precise with the boiling time for frozen beans, aiming for “tender crisp” as they’ll continue to cook in the oven. |
| Soggy Topping | Reserve at least half of your crispy fried onions to add during the last 10 minutes of baking. This keeps them wonderfully crunchy. |
| Bland Casserole | Taste and adjust seasonings (salt, pepper, soy sauce) before baking. Consider adding a pinch of garlic powder or onion powder. |
| Casserole Too Thin | If your sauce seems too thin, it might be from excess water on the beans. Ensure beans are drained well. A bit of extra baking time can also help thicken it. |
Creative Variations to Elevate Your Green Bean Casserole
While I adore the classic, I also love experimenting! Here are a few ways you can make this recipe your own.
| Variation Type | How to Adapt |
|---|---|
| Gluten-Free | Use gluten-free crispy fried onions. For the soup base, you can use a homemade cream of mushroom soup thickened with a gluten-free flour or cornstarch, or a gluten-free condensed soup if available. |
| Vegan | Opt for a vegan cream of mushroom soup (many brands offer this now, or make your own with vegetable broth and cashew cream). Use vegan crispy fried onions and ensure your milk is a dairy-free alternative like unsweetened almond or soy milk. |
| Elevated/Gourmet | Use fresh, high-quality mushrooms (like cremini or shiitake) sautéed with garlic and herbs for your soup base. Top with toasted slivered almonds or Panko breadcrumbs mixed with melted butter instead of fried onions for a different crunch. |
| Flavor Profile: Cheesy | Stir in 1 cup of shredded cheddar, Gruyere, or Monterey Jack cheese into the casserole mixture before baking, and top with more cheese along with the onions for the final bake. |
| Flavor Profile: Spicy | Add a pinch of cayenne pepper or a dash of hot sauce to the casserole mixture for a subtle kick. |
Prep Ahead & Storage Tips for Busy Cooks
I’m all about making life easier in the kitchen! You can definitely prepare this Green Bean Casserole ahead of time.
- To Prep Ahead: Assemble the casserole completely (up to step 3), cover it tightly with plastic wrap and then foil, and refrigerate for up to 2 days. When ready to bake, remove the plastic wrap, add the topping (step 5), and bake as directed, adding an extra 5-10 minutes to account for it being cold.
- Storing Leftovers: Once baked, let the casserole cool slightly. Cover it tightly or transfer it to an airtight container and store it in the refrigerator for 3-4 days.
- Freezing: I don’t typically freeze the fully baked casserole as the texture of the onions can change. However, you can assemble and freeze the unbaked casserole (up to step 4, but without the final onion topping). Thaw in the refrigerator overnight, then bake as directed, adding the final onion topping for the last 10 minutes.
- Reheating: To reheat individual portions, microwave them until warm. For larger amounts, you can reheat in a covered oven-safe dish at 300°F until heated through.
FAQs About Green Bean Casserole
I get asked a lot of questions about this dish, so here are some answers to common queries:
Can I use fresh green beans?
Yes, you can! You’ll need about 1.5 pounds of fresh green beans, trimmed. Blanch them in boiling salted water until they are tender-crisp (about 5-7 minutes), then drain thoroughly before proceeding with the recipe.
Can I make Green Bean Casserole ahead of time?
Absolutely! You can assemble the entire casserole up to the point of adding the final onion topping and refrigerate it for up to 2 days. You’ll just need to bake it a bit longer when you’re ready.
How long does Green Bean Casserole last in the fridge?
Baked and properly stored in an airtight container, it will last for about 3 to 4 days in the refrigerator.
Can you freeze Green Bean Casserole?
It’s best not to freeze the fully baked casserole, as the crispy onions can become soggy. However, you can freeze the unbaked, assembled casserole (without the final topping) and thaw it in the fridge before baking.
What kind of dish should I use?
A 2-quart baking dish is ideal, but a standard 9×13 inch baking dish also works perfectly. Ceramic, glass, or oven-safe metal dishes are all suitable.
Your Perfect Green Bean Casserole Awaits!
There you have it – my absolute favorite Classic Green Bean Casserole recipe that’s designed to be foolproof and utterly delicious! I truly believe this recipe will become a cherished favorite in your home, just as it is in mine. It’s proof that simple ingredients can create something truly magical.
I can’t wait for you to try it! Please, if you make this, leave a comment below and let me know how it turned out. I’d love to hear your thoughts, answer any questions you might have, or even hear about any fun variations you come up with! Happy cooking!
For more recipes, follow us on Pinterest.