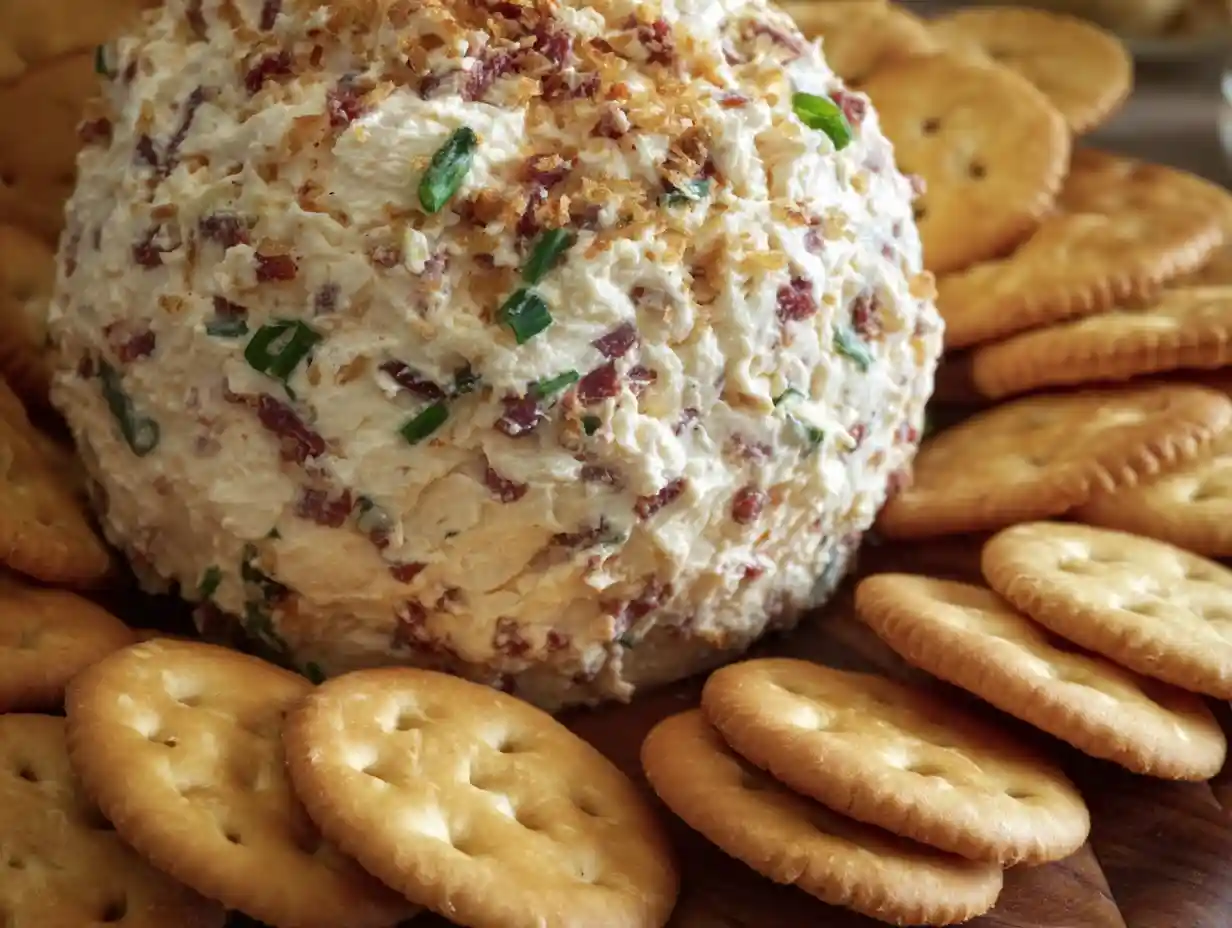
I’ll never forget the first time I brought this cheese ball to a holiday party. I almost didn’t make it, thinking it was too simple, too old-fashioned. But the moment I set it down on the appetizer table, it was like a magnet. Everyone crowded around, crackers in hand, and it was gone in what felt like minutes. That’s the magic of this Dried Beef Cheese Ball; it’s a timeless classic that never fails to be the star of the show.
This recipe is my go-to for a reason. It’s incredibly easy to whip up, packed with savory, smoky flavor, and has a wonderfully creamy texture that’s just irresistible. Whether you need a last-minute party dish or a planned-out holiday centerpiece, this appetizer is always a guaranteed hit.
Table of Contents
Dried Beef Cheese Ball
Ingredients
Equipment
Method
- Place 16 ounces (2 blocks) cream cheese, softened to room temperature, 1 Tablespoon Worcestershire sauce, 1/2 teaspoon black pepper, 1/4 teaspoon garlic powder and 1/4 teaspoon onion powder into a large bowl. Mix well with an electric hand mixer until smooth. Using an electric mixer is key here to get the cream cheese perfectly smooth and avoid lumps.
- Add ¾ of the smoked beef bacon, ¾ of the green onions, and ¾ of the cheddar cheese. Fold the ingredients in until well combined. Taste and add salt, to taste if needed.
- Save the remaining smoked beef bacon, green onions, and cheese in the fridge until you are ready to serve. Make sure you put it into a covered container or Ziploc bag before placing in the refrigerator.
- On a large work surface, lay out 3 large pieces of plastic wrap overlapping each other. Spoon the cheeseball mixture into the center of the plastic wrap.
- Start to fold the edges of the plastic wrap up around the mixture, helping to form it into a ball, and seal well. Place the cheeseball into the fridge for at least 2 hours or up to overnight to set up.
- When you are ready to serve, place the remaining smoked beef bacon, green onions, and cheese onto a large plate and mix together.
- Unwrap the cheeseball and place it on the plate, roll it around so the additional ingredients stick to the outside. You will then have to press them in to stick and try to cover as much of the exposed cheeseball as you can, you will have a little leftover topping, but that’s okay.
- Serve immediately with crackers or whatever you would like to serve with it.
Nutrition
Notes
Tried this recipe?
Let us know how it was!Why You’ll Love This Dried Beef Cheese Ball Recipe

- Perfectly Balanced Flavors: The smoky beef bacon, sharp cheddar, and zesty green onions create a savory combination that’s completely addictive.
- Incredibly Simple to Make: You only need a few basic ingredients and an electric mixer to bring this together. There’s no complicated cooking involved.
- Foolproof for Parties: This recipe is designed to be made ahead, which frees up your time on the day of your event. It travels well and looks impressive on any appetizer spread alongside other classics like the easiest classic Southern deviled eggs.
A Closer Look at Your Ingredients
The secret to a truly great cheese ball lies in using quality ingredients. For the dried beef, I use the finely chopped smoked beef bacon that comes in a jar. It has a salty, smoky flavor and a nice, tender texture that blends perfectly into the cream cheese. If you prefer, you can also ask your deli to very thinly slice dried beef and then chop it yourself at home.
For the base, you absolutely must use full-fat, block-style cream cheese that has been softened to room temperature. This is non-negotiable for achieving that perfectly smooth, creamy texture without any lumps. Low-fat versions or whipped cream cheese just won’t hold the ball shape properly. Finally, I always reach for sharp cheddar cheese because its bold flavor provides the perfect tangy contrast to the rich cream cheese and salty beef.
Ingredients
- 16 ounces (2 blocks) cream cheese, softened to room temperature
- 1 Tablespoon Worcestershire sauce
- 1/2 teaspoon black pepper
- 1/4 teaspoon garlic powder
- 1/4 teaspoon onion powder
- 4.5 ounce jar smoked beef bacon, finely chopped ((divided use))
- 4 green onions, thinly sliced (green part only) ((divided use))
- 1 1/2 cups shredded sharp cheddar cheese ((divided use))
- salt, to taste
How to Make a Dried Beef Cheese Ball (Step-by-Step)
- Place 16 ounces (2 blocks) cream cheese, softened to room temperature, 1 Tablespoon Worcestershire sauce, 1/2 teaspoon black pepper, 1/4 teaspoon garlic powder and 1/4 teaspoon onion powder into a large bowl. Mix well with an electric hand mixer until smooth. Using an electric mixer is key here to get the cream cheese perfectly smooth and avoid lumps.
- Add ¾ of the smoked beef bacon, ¾ of the green onions, and ¾ of the cheddar cheese. Fold the ingredients in until well combined. Taste and add salt, to taste if needed.
- Save the remaining smoked beef bacon, green onions, and cheese in the fridge until you are ready to serve. Make sure you put it into a covered container or Ziploc bag before placing in the refrigerator.
- On a large work surface, lay out 3 large pieces of plastic wrap overlapping each other. Spoon the cheeseball mixture into the center of the plastic wrap.
- Start to fold the edges of the plastic wrap up around the mixture, helping to form it into a ball, and seal well. Place the cheeseball into the fridge for at least 2 hours or up to overnight to set up.
- When you are ready to serve, place the remaining smoked beef bacon, green onions, and cheese onto a large plate and mix together.
- Unwrap the cheeseball and place it on the plate, roll it around so the additional ingredients stick to the outside. You will then have to press them in to stick and try to cover as much of the exposed cheeseball as you can, you will have a little leftover topping, but that’s okay.
- Serve immediately with crackers or whatever you would like to serve with it.
Creative Variations to Try
While I love the classic recipe, it’s also a fantastic base for getting creative. Here are a few fun variations I’ve tried and loved.
| Variation Name | Ingredient Swap/Addition | Flavor Profile |
|---|---|---|
| Spicy Kick | Add 1/4 tsp red pepper flakes or 1 finely diced jalapeño | Adds a gentle, warming heat that complements the savory beef. |
| Fresh & Herbed | Mix in 2 Tbsp fresh chopped dill or parsley | Brightens up the flavor with a fresh, herbaceous note. |
| Extra Savory | Fold in 1/4 cup of crumbled blue cheese | Introduces a bold, tangy, and funky flavor for cheese lovers. |
What to Serve With Your Cheese Ball
The right dippers can take your cheese ball experience to the next level. This cheese ball makes a great centerpiece when you want to create a simple, affordable charcuterie board. I like to offer a variety of textures and flavors so everyone can find their perfect pairing.
Crackers & Breads
You can’t go wrong with classic crackers. Their salty crunch is the perfect vehicle for the creamy cheese. My top picks are buttery Ritz crackers, sturdy Wheat Thins, and woven Triscuits.
For something a little fancier, I also love serving it with thin slices of a toasted baguette, crispy pretzel crisps, or even pieces of a fresh foolproof sourdough focaccia.
Fresh Vegetables
For a lighter, healthier option, fresh veggies are a must. Their crispness provides a refreshing contrast to the rich cheese ball. I always put out sturdy options that won’t break when dipping, like celery sticks, carrot sticks, thick bell pepper strips, and cucumber slices.
Gluten-Free Options
To make sure everyone can enjoy it, I always include a few gluten-free choices. There are many great gluten-free crackers on the market now that work beautifully. The vegetable dippers I mentioned above are also a fantastic naturally gluten-free option.
Pro Tips for the Perfect Dried Beef Cheese Ball
- If your cheese ball is too soft: The two most important factors for a firm cheese ball are softened cream cheese and proper chilling. Make sure your cream cheese is at room temperature, not melted in the microwave. The mandatory 2-hour chilling time is what solidifies the ball, so don’t skip it. If it still feels a bit soft, mixing in an extra 1/4 cup of shredded cheese can help it firm up.
- To make the coating stick: The secret is to press the coating onto a very cold, firm cheese ball. Chilling makes the surface slightly tacky, which helps the toppings adhere. After rolling the ball in the coating mixture, use your hands to gently press the pieces into the surface to ensure they are secure and the ball is evenly coated.
Storage Instructions
One of the best things about this recipe is how easy it is to prepare in advance. Here’s how to store it properly.
Make-Ahead
You can prepare the cheese ball mixture, form it into a ball, and wrap it tightly in plastic wrap up to 3 days before you plan to serve it. Store it in the refrigerator and wait to add the final outer coating until just before you put it out for your guests.
Refrigerator
Leftovers? No problem. Simply wrap the cheese ball tightly in plastic wrap to keep it from drying out. It will stay fresh in the refrigerator for up to 5 days.
Freezer
You can also freeze the cheese ball for longer-term storage. To do this, wrap the uncoated ball first in plastic wrap, then add a protective layer of aluminum foil. It can be frozen for up to 1 month. When you’re ready to use it, let it thaw in the refrigerator overnight, then roll it in the fresh coating before serving.
FAQs about Dried Beef Cheese Ball
Can I use a different kind of cheese?
Absolutely. While I love the bite of sharp cheddar, you could also use a medium cheddar, Colby, or Colby Jack cheese for a milder flavor.
What is the best type of dried beef for a cheese ball?
I prefer the jarred, finely chopped smoked beef bacon because it mixes in easily and has a great flavor. You can also use thinly sliced dried beef from the deli counter; just be sure to chop it very finely before adding it to the mixture.
Why won’t my cheese ball form a solid ball?
This is usually due to one of two things: the cream cheese was too soft (melted instead of room temperature), or the cheese ball didn’t chill long enough. Make sure to let it set up in the refrigerator for at least 2 hours to allow it to become firm.
Can I make this dried beef cheese ball ahead of time?
Yes, this is the perfect make-ahead appetizer! You can make the ball (without the coating) up to 3 days in advance and keep it wrapped in the fridge. Just add the coating right before serving for the best texture and freshness.
The Perfect Party Starter
This Dried Beef Cheese Ball is more than just a recipe; it’s a tradition. It’s the appetizer I can always count on to bring people together and get the party started on a delicious note. It’s simple, savory, and a total crowd-pleaser every single time. I hope you love it as much as I do.
What are your favorite things to serve with a cheese ball? Let me know in the comments below – I love hearing your ideas